Here in Texas we're nearing the end of the school year (yes, really) and all I can say is... "phew, at last!". I'm sure i'll be eating my words when the summer is dragging on and the boys are driving me crazy, but this semester has dragged on with barely any respite since Christmas. Unlike the UK, where the kids get a 2 week break for Easter and a mid-term week off either side of that holiday, here in Texas we slog it out from the beginning of January with just Spring Break in February. We are exhausted. And I am particularly fed up of the morning chore of getting packed lunches made. What a faff, and such a drain on my time when I am struggling to get the boys (and myself) up, dressed and breakfasted as it is. I am also looking forward with a bit of dread to the new school year starting in August, when all 3 of my boys will be attending school every day and will need uniforms ironing and lunches made... bah! At the moment the twins only go twice a week and don't start until 9.30am giving me time to sort out the Big One and get him safely delivered to school before I even contemplate getting the little ones ready! So I am going to need to streamline and organise the process.
With this in mind I bring you the results of a trial I have been undertaking... frozen sandwiches made ahead of time. The idea was inspired by my younger brother, Gavin, who undertook an mechanical engineering apprenticeship at the tender age of 16. Being a slothful teenager, he would leave it until the very last minute possible before jumping out of bed and onto his pushbike to get to work. Living as he was on an apprentice's wage, he couldn't afford to visit the greasy burger van parked outside his workshop daily like his colleagues, so resorted to making his own 'butties' at the weekend and freezing them ready to grab-and-go. While I admired his thrifty-ness and planning, I always shied away from the idea assuming the 'sarnies' would be soggy or suffering from freezer burnt bread.
I am delighted to report that this is NOT the case, as long as you follow some golden rules! I've split this post into sections to cover all the requirements of a packed lunch fit for a king (or prince/princess, as required)!
Part 1: The Sandwich (a.k.a. buttie, sarnie, sub, wrap etc..)
Golden Rule #1... The key to making this work is to make sure that you choose your fillings wisely. Not all foods freeze well and a spell in the extreme cold can do strange things to certain sandwich fillings!
Sandwich fillings that
CAN and do freeze well include:
- Meat - cold sliced roast meats (a great way of using up leftovers after a Sunday roast), hams, cooked bacon, deli meats, salami, cooked sausages, meatballs etc...
- Fish - tinned tuna, salmon, sardines etc... Smoked salmon or mackerel also fabulous.
- Cheese - grated is best as freezing tends to make cheese crumbly. All hard cheeses work well, as does Philadelphia cream cheese, Brie, Camembert, Feta and Swiss. Full fat freezes better than low-fat cheese. (See below for some cheese exceptions!).
- Jams & jellies
- Peanut butter (and other nut butters)
- Marmite/vegemite
- Nutella
- Honey
- Pesto
- Sliced/chopped olives, sun-dried tomatoes and capers
- Pickles, chutneys and mustards
- Caramelised onions, cooked aubergine (eggplant) and courgette (zucchini) slices
Even the fussiest eater must be able to find some combination of the above that works for them?!
Things that
CAN NOT be frozen in a sandwich:
- Eggs - they go very rubbery.
- Mayonnaise - this tends to seperate in the freezer.
- Salad, fruits & raw vegetables - go watery, soggy & limp once frozen.
- Cottage cheese
Don't assume that because you can't include salad, raw vegetables or mayo in your salad you will have a boring sandwich (see part 2 for more ideas)!
Golden Rule #2... To prevent the bread from going soggy you will need to take preventative steps. The best method is to use a thin layer of butter or margarine spread all the way to the edges of both slices of bread. These help make the bread 'waterproof'! Alternatively you could use peanut butter (or another nut butter). This rule is especially important with sandwich fillings that are wet, like jam, honey and chutneys. While mentioning bread it's worth noting that all types of bread work well for frozen sandwiches:
- Sliced (white, wholemeal, granary, sourdough, rye etc...)
- Rolls, baps, bagels & croissants
- Tortillas and wraps
Golden Rule #3... Wrap your sandwiches individually with plastic wrap or a ziploc sandwich bag making sure to squeeze out as much air as possible. Then store them in a larger airtight container, such as a gallon size ziploc bag, plastic tub or even the bread bag. Again try to avoid too much air around them as this minimizes any potential freezer burn that can harden the bread. It is a good idea to label the sandwiches unless you enjoy the idea of a lucky dip lunch! Frozen sandwiches are good for up to about 1-2 months, but after this you will start to notice a deterioration... I suggest you make a week or 2 ahead of yourself at most (you'd be lucky to fit many more than that in your freezer anyway).


To use the frozen sandwiches, remove from the freezer the night before and place in the fridge overnight to defrost. Or if you live in Texas like me, where it's flippin' hot most of the time, simply place in the lunchbox in the morning and it will be perfectly defrosted by lunch! If you have access to a sandwich toaster during your lunch break, some sarnies lend themselves very well to a bit of toasting!
Part 2: The sandwich 'extras' & alternatives!
A plain ham sandwich is unlikely to float the boat of many adults (although, this may suit many kids). But fear not ... there are plenty of things you can do to supplement your sarnie that can be prepared in advance and either frozen or refrigerated.
Salad... While freezing your salad is a definite no-no, this doesn't mean that you can't include this in your lunch AND prepare at the weekend for the week ahead. Simply fill small ziploc bags or plastic pots with ready prepared salad. Just don't include the dressing and leave 'wet' ingredients like tomatoes whole (baby plum or cherry tomatoes are perfect). You can prepare a little bag/pot for every day of the week all in advance so that when you are filling your lunchbox, you simply grab the salad from the fridge along with the sandwich from the freezer! Then at lunchtime, simply pop the salad into the sandwich and hey, presto... a far more interesting sandwich!
Dressing... You may not be able to freeze mayonnaise IN your sandwich, but as with the salad, it doesn't have to be excluded. You can use small pre-packaged sachets/packets of dressings - either save unwanted ones from when you eat out or get takeaway or you can buy boxes of these. Warehouse clubs like Costco often do these at good value for money or order online. Alternatively, 1- or 2-oz baby food storage pots are the perfect size for decanting your own condiments and this is obviously better value.
Alternatives... You'd be surprised what can be frozen in individual portions that make brilliant packed lunches instead of a sandwich:
- Cooked slices of pizza, wrapped tightly in plastic wrap and frozen. They defrost ready for lunch like the sandwiches... and who doesn't like a bit of cold pizza!!!
- Similarly, quiche or pie portions (my Darth Vader mini sausage rolls would be perfect for this) wrap and freeze well.
- A portion of cooked pasta and sauce frozen in a plastic pot. This is great simply defrosted and eaten cold or can be reheated in a microwave if available... just remember the rules of what can & cannot be frozen from the sandwiches (i.e. no mayonnaise!). This works best when the pasta is slightly al dente, as freezing causes the pasta to soften slightly.
- Boil a batch of eggs until hard-boiled, cool and then store in the (labelled) box in the fridge. Grab an egg or two to take in your lunch and simply peel when ready to eat!
Part 3: Healthy bits
In addition to the main sandwich (or alternative) it is often nice to include a few extra bits. I always try to include some healthy extras and many of these can be prepared ahead of time:
- Prepared fruit - If you are preparing for the week ahead you can wash and prepare some fruits for use in the early part of the week. Many fruits start to spoil within a day or two of being washed so plan to use prepared pots/bags of fruit early in the week. For example a little pot of washed (and dried) berries and/or grapes prepared on the Sunday evening would be great to take for lunch on Monday or Tuesday. Segmented citrus fruit will last 2-3 days as long as it's stored in a small airtight container (after that it will start to spoil). Similarly, cut pineapple will stay good for a few days, but will end up with a lot of juice after the first day or so so may need a fork!


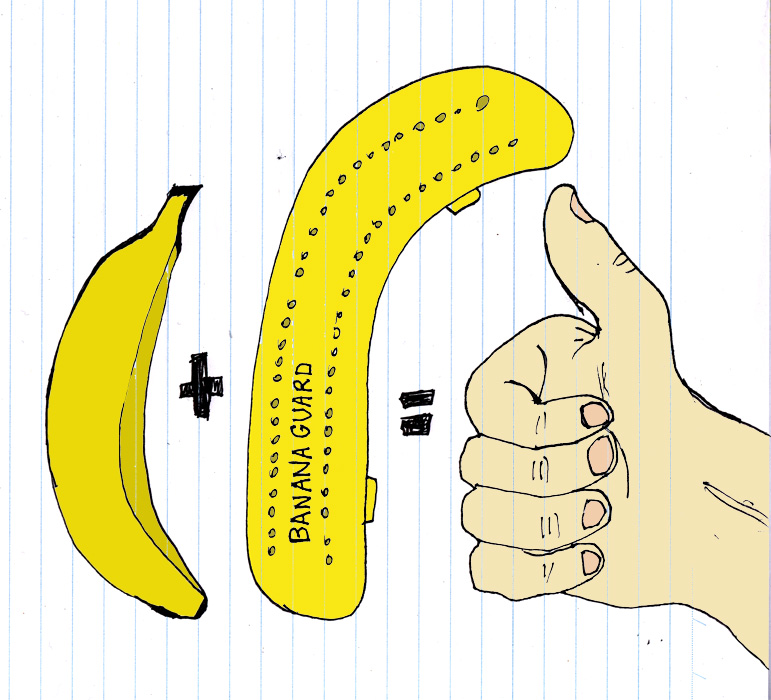
- Fresh fruit - Many fruits are well designed by Mother Nature for easy transportation and can work well for older kids and (obviously) adults. An apple only needs a quick rinse in the morning before packing in the lunchbox. Citrus fruits have their own 'jackets' as do bananas. If you find your bananas bruise and brown too easily, try a banana guard (I blogged about these little wonders before)!
- Fruit smoothies - Use fresh or frozen fruit, juices and/or yoghurts to make smoothies in advance. These can be frozen in cups with lids and then defrosted in the fridge/lunchbox for a healthy & tasty slushy! Click here for some more ideas like this from www.meetthedubiens.com

- Dried fruit & nuts- Raisins in boxes (or decanted into small pots/bags) are easy to have lined up for the whole week. Other dried fruits and/or nuts can be purchased in bulk and divided into easily grabbed portions ready to be popped into a lunch box.
- Fruit leathers - see my recipe for your own dried fruit leathers or roll-ups... very tasty and nutritious!
- Yoghurts - You can buy 'tubes' of yoghurt that are perfect for lunchboxes (e.g. Petit Filous Frubes in the UK, and GoGurts or Squeezers in the US) . They freeze brilliantly and make excellent healthy alternatives to ice lollipops. Placed in a lunchbox in the morning, they help to keep the lunch cool while slowly defrosting in time for lunch!
- Crudites & dips - Rather than having your veggies and dressings in your sandwich, have them on the side. Washed and peeled baby carrots, chopped celery sticks etc... can be prepared at the weekend in small portions ready for the week. You can buy special snack containers that have built in dip holders and are fab. Alternatively, simply bag up the veggies and use the mini baby food pots mentioned above to decant the dips. These can be prepared for the whole week and stored in the fridge ready to grab & go in the morning.
Part 4: 'Unhealthy' treats
A small treat in the lunchbox is often well received and they don't have to be totally 'unhealthy'! Some ideas for prepare ahead treats are:
- Muffins or cake - homemade or store-bought mini muffins or portions of cake can be wrapped and frozen individually for an easy to grab portion perfect for a lunchtime treat.
- Cookies & crackers - buy in individually portioned packages, or buy in bulk and decant into small containers in advance.
On a final note, one of the best bits of advice I can suggest is to get everyone involved... get a production line going and make it a part of your Sunday evening routine... even the younger members of the family can fill a pot with crackers and do their bit!
As this is still an ongoing trial I'd love to hear any other ideas or suggestions... so please leave your comments below! xxx