• RSS
  • Facebook
  • Pinterest
  • Twitter
  • Google+
Posted by Mama Max - - 0 comments


Silent Sunday
[ Read More ]

Posted by Mama Max - - 4 comments

Parties wouldn't be parties without pressies!  Whether it's a gift for the party hostess to say thanks, or party favors or a slice of cake to send home with your guests, there are many uses for these cute and really easy bags!  I used a paper lunch bag, but you could use bags of any size and scale the design accordingly... let your imagination go wild!  You could even use the same idea for other flags and other celebrations... picture stars & stripes for the 4th July!  They could even be used as luminaria to decorate the garden for an evening street party... read on for more information.


You will need...

  • Blue paper lunch bags (the ones I have are approximately 5" wide x 3" deep x 11" tall)
  • White paper
  • Red paper (I used some lovely 'velvet' paper I found in the craft store scrapbook section)
  • Glue
  • Scissors (or a guillotine)


Firstly, cut your red paper into strips.  My strips were 1/2" wide, but use your judgement based on the size of your bag.  You will need 4 strips per bag.


Then cut 4 strips of white paper... these need to be double the width of the red ones (so mine were 1" wide).


Glue your white strips onto the bag.  Start with one going vertically down the length of the bag.  Place the 2nd one perpendicular to it to create a cross.  Then glue the other 2 in another cross at 45' angle to the first.


Repeat with the red strips, overlaying the white ones.


Trim the overhang with scissors to finish.  Easy peasy!


Other variations on this idea include the following (for suggested online supplier information click on images below):


  • Fill the paper lunch sack with sand and light a small votive candle to make a luminaria (for outside use)... watch carefully and take necessary precautions to prevent fire.  Alternatively, use an empty jam jar with a votive candle inside and pop inside the bag.  For best results, use a light blue paper bag... as you can see, the royal blue was quite dark!   You can even buy battery operated votives if you are concerned about safety, particularly with children around.


  • Wine bottle totes - don't go empty handed to the party!  Use a solid colored blue wine tote and decorate as above!


  • Treat boxes for picnic lunches - decorate each box with a Union Jack for a child's easy picnic solution! 


  • Larger gift bags - scale up the design above for larger pressies!


[ Read More ]

Posted by Mama Max - - 4 comments

Cupcakes are very pretty in their own right when frosted and decorated, but I've always found the patterned paper cupcake cases a waste of money. Most are cheap and end up absorbing the oils in the cake batter to look greasy and consequently their colours & patterns become transparent anyway. I personally prefer to use good quality plain parchment paper cases or the foil ones. However, for a special, themed party it's nice to add a bit of color & pattern to the base of the cupcake too! This is where cupcake wrappers are useful!

You can buy them, but they are relatively easy to make yourself!  I made a classic Union Jack flag cupcake wrapper, but also a diamond studded crown to mark the Queen's Diamond 60th Jubilee!


To make these cupcake wrappers, you will need...

  • a printer
  • white cardstock (or plain paper) - standard letter size (8.5"x11")
  • scissors
  • sticky tape or glue
  • cupcakes

First of all, click on the previews of the templates below to open the main .pdf file.  The template is set up to print on standard letter size paper measuring 8.5" x 11" (slightly smaller than A4).  Ensure that your printer is set for this size of paper and make sure that there is no 'scaling' of the document selected.  Print onto plain white card or paper.  Cut out and tape (or glue) the two short sides together with a minimal overlap to create a slightly conical ring.  Gently drop the frosted cupcake into the wrapper.  This template will fit most normal sized cupcakes, but if you want to check beforehand, the diameter of the base is 45-50mm and across the top is approximately 75mm.


These printables are provided free on the understanding that they are for personal use only and not to be reproduced, altered or used for commercial purposes (please contact me for more information if necessary)!  Thanks!


[ Read More ]

Posted by Maxine Cleminson - - 3 comments

I'm feeling decidedly patriotic today, being St George's day so I thought it would be an appropriate time to launch a planned series of posts in the lead up to the Queen's Diamond Jubilee! A year ago this April, I hosted a party for my fellow British expats here in Houston, Texas, to celebrate the Royal nuptials of Prince William and Catherine Middleton. There was much flag waving, hat wearing, quaffing of copious amounts of champagne and general merriment... but the bit I enjoyed most (believe it or not) was the planning & preparing of the food! Being a Brit abroad, there are many favourite comfort foods you simply have to learn to live without on a regular basis, but with a Royal Wedding to celebrate I felt compelled to provide a buffet that encompassed the best of British cuisine.

With the Queen's Diamond Jubilee fast approaching next month, I thought I ought to share some of my recipes and ideas for those of you planning to celebrate this milestone with a quintessentially British street party! I'm going to be on holiday in Lanzarote with my family for the Jubilee but am planning to pop some Union Jack bunting in my suitcase for this very purpose!

I shall be sharing some of the best of my Jubilee street party food recipes, ideas & printables over the next week or two, so check back regularly!  Here are some to be getting on with:

Union Jack Party Cake


Every party needs a cake... and for a Jubilee party you may need one that can feed the whole street!  For the royal wedding party I hosted last year, I did consider creating a mini tiered traditional wedding cake, but in the end practicality won out.  I needed something quick and easy to put together that still encompassed the feel of the occasion.  So I bought a plain white iced sheet cake (from good old Costco) and decorated it with fresh berries to look like the Union Jack Flag!  Very easy, quick and yet oh, so effective!


You will need...

  • A rectangular cake, frosted with white icing (homemade or shop bought depending on your preference)
  • Red berry fruits, washed and dried carefully, e.g. strawberries or raspberries
  • Blue berry fruits, washed and dried carefully, e.g. blueberries or blackberries

Rinse, hull and prepare your fruit (cut larger berries in half).  Dry them very carefully on paper kitchen towels.  Create a cross with red berries going vertical and horizontal across the cake.  Then, add diagonal lines of red berries going from the center to the four corners.  Finally, fill in the gaps with blue berries.

Mini Fish n Chips in newspaper cones


This is one of the things I miss about the UK... a fish 'n' chip supper eaten hot & straight from the paper with lashings of salt & malt vinegar!  Delicious!


You will need...


Firstly, get your paper cones prepared in advance.  Cut a pile of newspaper squares measuring approximately 4"x 4".  Then cut a matching pile of greaseproof paper squares... these can be the same size or marginally smaller if you want neater edges.  Lay a square of greaseproof paper on to of a newspaper square, and then roll two opposite corners towards each other to create a cone shape.  Secure with a staple trying to keep the pointy end closed.  Stack them to keep their shape until you are ready to serve.
Then, simply prepare you chips (french fries) and fish goujons.  Pop a few chips and a fish goujon in each cone to serve.  And don't forget to provide the salt & malt vinegar!


Marmite & cheese mini tarts


Marmite... us Brits either love it or hate it!  I personally couldn't live without it's salty, savoury, sticky, dark yummi-ness!  These are dead easy to make and store in advance, as long as you can stop yourself from scoffing them all before the party!

You will need...

  • Shortcrust pastry dough (ready made or homemade)
  • Marmite
  • Grated mature cheddar cheese
  • Cookie cutter
  • Shallow mini-tart baking tray/cupcake tray, greased.

Roll your pastry on a floured surface and cut rounds of pastry to fit the tarts in your baking tray.  Place a small dollop of Marmite in each tart and then top with grated cheddar cheese.  Bake at 375'F (190'C) for about 10 minutes until the cheese is melted and the pastry golden.  Allow to cool in the tin for about 10 minutes before removing to a wire rack.  When completely cooled, store in an airtight container until needed.


Cucumber sandwiches


First off, these are a must.  If anything says "British buffet" it's a good old cucumber sarnie!  To make these perfect you will need...

  • English seedless cucumber/s, rinsed but not peeled unless you prefer (if you can only find the normal US seeded ones then peeling is probably best)
  • Soft, white thin-sliced bread ('Homestyle Bread' from the supermarket in-house bakery is the closest I have found to traditonal white sliced loaf here in the US)  
  • Butter or buttery spread
  • Salt & pepper
  • Freshly squeezed lemon juice

First of all, these don't sit well and tend to go a bit soggy if made too far in advance, so leave until the last minute if possible.  Second of all... lay off any embellishments like cream-cheese or dill or spices or even salmon... these are American variations of this traditional sarnie and as her Majesty would say "...not to be encouraged".

You will need to butter both slices of bread to the edges to stop the bread getting soggy.  Then, slice the cucumber as thinly as possible in rounds.  Lay the slices of cucumber on one slice of the bread overlapping slightly.  Season lightly and dash with a small amount of lemon juice.  Top with another slice of buttered bread.  Then you really should cut the crusts off, regardless of what your parents told you about eating them!  And cut them into triangles or fingers and arrange nicely on a serving plate.  Garnish the plate of sandwiches with twisted cucumber slices!


For more ideas for your Jubilee Street Party see the following blog entries:


  • Diamond Jubilee Cupcake wrappers - free printable & instructions!


  • Union Jack paper gift bags, party favors and luminaria!


  • A DIY cupcake stand with union jack bunting!


  • More food ideas and recipes!


  • [ Read More ]

    Posted by Mama Max - - 9 comments


    Silent Sunday
    [ Read More ]

    Posted by Mama Max - - 3 comments

    I love cake. And I love pinterest.com too as I've blogged about before! So when the latter helped me find a novel, super-quick and low-calorie version of the former, I was in heaven! The pin in question linked to a great blog called The Hidden Pantry written by Diane Cosby. Her recipe for 1-2-3 Cake sounded too good to be true so I thought I'd try it and share the results with you guys!


    1-2-3 Mug Cake

    You will need...

    • A box of Angel Food Cake mix ... it must be Angel food cake!
    • Any other box of your favourite cake mix ... I chose a Devil's Food chocolate cake mix
    • A large (gallon size) ziploc freezer bag & marker (or airtight container)
    • A tablespoon
    • A microwave safe mug
    • Water
    • Microwave
    Simply empty the dry cake mixes into one freezer bag or container and shake to mix.  This can then be stored as is, until you fancy a sweet treat.


    To make the cake, grab a mug and tablespoon.  This is where the 1-2-3 bit comes in:

    - Add 3 tablespoons of your premixed cake mix powder


    - Add 2 tablespoons of water and stir gently until just mixed


    - Microwave on high for 1 minute!


    Hey presto, a cake!  I served mine with fat free greek yoghurt to be really healthy, but you could add a dollop of vanilla icecream or whatever takes your fancy!


    Recipe review
    I loved the simplicity and ease of this recipe.  A sweet treat without having to bake a whole cake (and then running the risk of eating the whole thing in one go!).  It was tasty and sweet, but not particularly rich and moist... I guess the absence of eggs and fat would do that!  The texture was very light and I actually had a few large air pockets in mine ... I would guess this came from over-mixing the water and cake mix, so that's worth bearing in mind.  While not my favourite cake ... far too few calories ;-) ... it really did hit the spot in providing a sweet dessert without loading up on the calories and saturated fat and it was literally as easy as pie (well, cake!).  I am delighted with this recipe and look forward to trying a few other mixes in the future!

    On a final note, I worked out the nutrition information for those interested, although it's worth bearing in mind that this will vary depending on the cake mixes you use.    


    1. Firstly, you need to work out the total calories for the entire box. If you look at the nutrition label you will see the calories listed for the recommended portion size, but it also tells you how many portions in the entire box.  You simply need to multiply these two numbers together.  
    2. Do this for both boxes and then add together.  That is how many calories in the entire ziploc bag of cake mixes.  
    3. To find out how many calories there are in each mug cake, you need to divide the total by the number of mugs you can make.  I worked out that each cake mix was approximately 3 cups (6 cups in total) and there are 96 tablespoons in 6 cups.  Divide the total number of calories by 96 and then multiply by 3 (or just divide by 32) for the 3 tablespoons you put in each mug! 
    Sounds complicated, but it really isn't!  The bottom line is that this mug cake contains approximately 100 calories and only 0.5 grams of total fat ... not too bad in my book!

    Oh, and if you are following Weight Watchers, this equates to 2 points (old system) or 3 points (on the Points Plus system!). 

    Amount of:
    Betty Crocker Super Moist Devil’s Food Cake Mix portion (total = x10)
    Betty Crocker Angel Food Cake Mix portion (total = x12)
    Totals of mixes combined
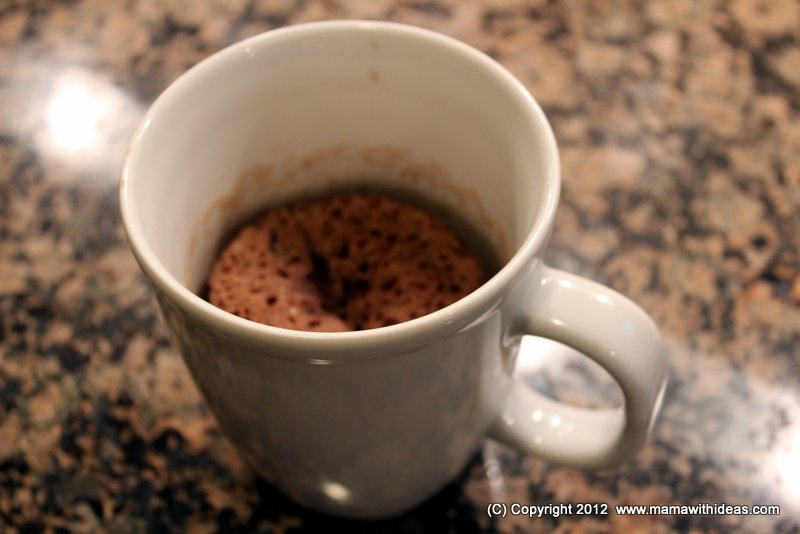
    1-2-3 Mug cake (per portion)
    Weight (dry)
    43g (430g)
    38g (456g)
    886g
    28g
    Calories
    160 (1,600)
    140 (1,680)
    3,280 calories
    103 calories
    Total Fat
    1.5g (15g)
    0
    15g
    0.5g
                -  Saturated Fat
    1g (10g)
    0
    10g
    0.3g
    Cholesterol
    0
    0
    0
    0
    Sodium
    360mg (3,600mg)
    310mg (3,720mg)
    7,320mg
    229mg
    Total Carbohydrates
    35g (350g)
    32g (384g)
    734g
    23g
                - Dietary fiber
    1g (10g)
    0
    10g
    0.3g
                -  Sugars
    18g (180g)
    23g (276g)
    456g
    14.25g
    Protein
    2g (20g)
    2g (24g)
    44g
    1.4g

    [ Read More ]

    Posted by Maxine Cleminson - - 0 comments

    One of the biggest challenges in feeding a child is to combine your knowledge of healthy foods with the task of actually getting your child to eat it!!! Young children are notoriously fussy eaters and to get them to eat a varied, healthy, balanced diet is often difficult. So I thought it was about time I shared one of my most successful child-friendly recipes... an adaptation of the humble fish finger!

    Like many children, my brother & I grew up on fish fingers... the bright orange crispy breadcrumbs and the flaky white fish inside... yummy! They were probably not the healthiest dinner out there, especially when served with deep fried potato chips, but in terms of kid-satisfaction Mum always got the thumbs up from us! So when the Big One graduated onto big-boy meals I looked out the frozen fish finger in the supermarket. There seemed to be a lot of variation in quality, with some of the cheaper brands not even able to specify the type or part of the fish in question. However, some of the nicer ones were clearly labelled '100% fillet' and used paprika rather than artificial colouring to achieve the traditional golden coating. So it wasn't long before the Big One became hooked and a fish finger supper became a regular serving on the menu.

    However, when we moved to Texas from the UK we were stumped. The equivalent over here are called 'Fishsticks' and they are much less popular. Consequently, there is little variety in the brands & types available. Most that I have come across are made with 'minced white fish', and instead of breadcrumbs they are coated with batter. So rather than settle for second best, I decided to make my own ... how hard could it be, right? Easy peasy is the answer and they are far more delicious than any store bought ones too!  I find it best to prepare a large batch ahead of time and then freeze uncooked. They can then be cooked from frozen in about 15 minutes for a quick, nutritious meal.


    Over time, I have adapted the recipe to incorporate healthier ingredients, especially key foods for brain development in infants and children (and for maintaining brain health in adults). My grandfather died of Alzheimer's disease a few years ago and so I am very aware of the importance of feeding this key organ right!

    Antioxidants - foods with antioxidant vitamins and minerals act in a way to protect the brain & body from wear & tear! Basically, as you breathe your cells react with the oxygen absorbed and some highly reactive molecules called free radicals are produced.  These free radicals can interact with other molecules within your cells and can cause damage to proteins, membranes and genes. Antioxidant molecules help prevent the oxidation process and therefore reduce potential cell damage. Foods high in antioxidants include fruits & vegetables, especially those with bright intense colours (e.g. berries & dark green leafy veg). However, beans, nuts & seeds are also packed with antioxidants such as Vitamin E.


    Choline - this is a nutrient essential to healthy brain function and memory. It is especially important for pregnant & nursing mothers to make sure they have enough choline-containing foods in their diet as studies have shown that this nutrient is key to fetal/infant brain development. Luckily it's present in quite a few foods (such as broccoli, beans, cauliflower, tofu and lean beef), but the best source of choline is eggs, specifically the yolks!


    Omega 3 Essential Fatty Acid - this is a well known key nutrient for good brain health. However, they are also crucial for eye development and help stabilise moods. Oily fish, nuts & seeds are the best sources of Omega 3.


    Complex carbohydrates - these fiber-rich grains & starches are the fuel of the brain! Unlike refined starches (like those in white bread, white rice, sugar etc...) the energy from fiber-rich foods is released slowly and steadily over time! Whole grained bread, pasta, rice etc... is best!


    Brain Boosting Fish Fingers
    For approximately 48 brain-boosting fish fingers, you will need...
    • 1lb salmon fillet (or you could substitute with trout or any other oily fish)... make sure that it has not been previously frozen if you plan to make these to freeze for future use - Omega 3 fatty acids & choline
    • 1 cup wholewheat breadcrumbs - Complex carbohydrates
    • 1 cup ground flax seeds (called linseed in the UK) - Complex carbohydrates, omega 3 fatty acids & antioxidants
    • 2 tablespoons buckwheat flour  (you can substitute regular wholewheat flour) seasoned with a small amount of salt & pepper if desired - antioxidants & complex carbohydrates
    • 1 or 2 beaten eggs - Choline & Omega 3


    Remove the skin from your salmon fillet (lay the fish skin side down, use a sharp knife to make a slit in the flesh at the thin tail end, hold the skin tightly and then cut  along the skin at a 30' angle to the board).  Check to make sure there are no small bones... the easiest way to do this is to run your fingers over it.  Then cut the fillet into strips approximately 3/4" wide and 2-3 inches long... unlike shop-bought fish fingers, uniformity isn't necessary!


    Line a baking sheet with baking parchment.  Then assemble your ingredients for breadcrumbing the fish.  I've blogged about the best method for coating things in breadcrumbs before when describing my Mum's Leftover rissoles, but the key is to get organised with your plates of fish, flour, egg, breadcrumbs and the lined tray to freeze them on in advance.  And then remember to keep your hands assigned to wet & dry roles!


    Roll the fish strips in the flour.  To prevent you getting in a sticky mess, use only your 'dry' right hand for flour.


    Then dip the fish in the egg - only using your 'wet' left hand.


    Then roll the fish in the breadcrumbs - using your 'dry' right hand.  Place the finished fishfinger on the lined tray.


    Open freeze the fishfingers and then transfer into a ziploc freezer bag or container, labelled with details of contents.


    To cook, simply shallow fry in oil over a medium-high heat turning occasionally until golden and crispy on the outside and fully cooked and pale pink within.  Drain on kitchen paper before serving.  They can also be oven cooked... place on a lightly oiled baking sheet, brush or spray with a little olive oil so the breadcrumbs go crispy and then bake at 375'F (190'C) for approximately 15-20 minutes (again, check they are fully cooked before serving).


    Serve with antioxidant-rich vegetables such as asparagus, carrots, broccoli & sweetcorn, and a portion of skin-on oven baked potato wedges or steamed new baby potatoes for a healthy, balanced, quickly prepared, and most important child-approved dinner!


    [ Read More ]

    Related Posts Plugin for WordPress, Blogger...