• RSS
  • Facebook
  • Pinterest
  • Twitter
  • Google+
Posted by Mama Max - - 0 comments

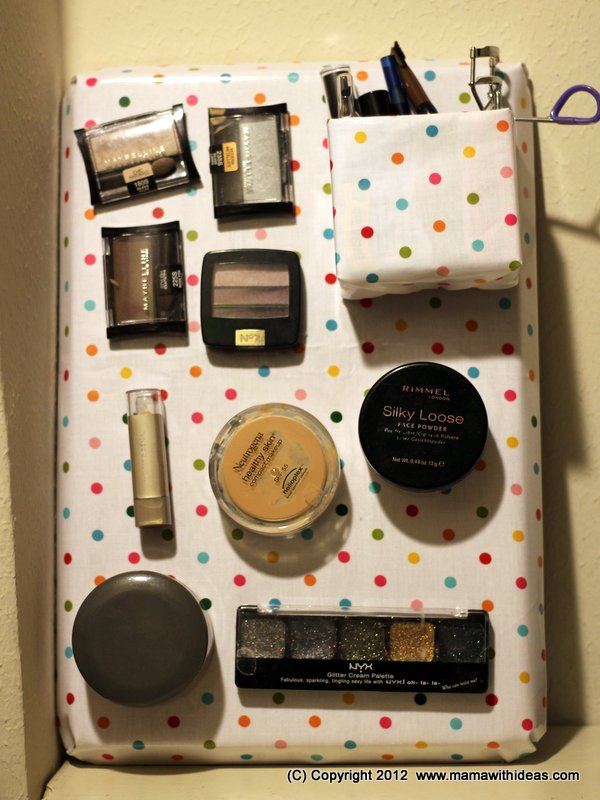
A while ago, I blogged an idea for storing necklaces using shower curtain hooks.  It was only as I was writing that blog entry and adding the photos that I got a little embarrassed about the state of the shelf above my neatly organised necklaces.  There was makeup items strewn all over the place.  Let's face it, ladies... makeup is a pain to store at the best of times.  I've given up using a makeup bag (except when travelling) as they always end up a bit yucky inside... it only takes a top to come off a kohl pencil or an eyeshadow case to open and the whole thing is a powdery, icky mess.  But at the same time, it's a bit of an eyesore to have it all strewn over the bathroom (or closet) counter.  So I was totally inspired by an idea documented on a blog called Laura Thoughts.  She used a picture frame with a sheet of metal to create a magnetic display for her makeup.  Fabulous and very creative.  So I decided to use her idea, but to use recycled bits to create my own.


You will need...


Cut a piece of fabric a few inches wider than your cookie tray all the way around.  Place the cookie tray on the wrong side of the fabric and fold the fabric up and over the sides of the tray.  Glue into place, making neat folds at the corners.  Turn the tray over and you have a pretty magnetic board!


Cut strips of magnetic tape, and glue to the back of your makeup items.  The heavier the item, the more magnetic tape you will need.  The items can then be put on the tray.


Cut a small box to the right size to store your smaller items such as mascaras, kohl pencils etc...  Wrap it in some more of the fabric and glue in place, neatening the edges.  Attach more magnetic strips to the back of the box and attach to the board.


You can either prop the board up on your bathroom counter or closet shelf, or hang on the wall next to your mirror.  All the items you need are easily visible and obtainable, and kept out of the way!  Easy peasy, and only 20 minutes to make!


[ Read More ]

Posted by Mama Max - - 0 comments


I have been on a diet for the last couple of months in an attempt to shift some of the weight I've gained since my overactive thyroid function was 'fixed'.  Whilst Graves' Disease is no laughing matter, it did have the rather delicious side-effect of allowing me to get away with massively overeating without gaining a pound!  If it weren't for all the other nasty side effects it would have been brilliant!  I am now thankfully in remission and have normal thyroid levels which is fantastic... the only problem is that my body is still used to consuming far more calories than I actually need, so I have seen the weight pile on.  However, I decided a couple of months ago that something needed doing so I began a diet... I've lost about 12 of the 20lbs I am aiming to shift, and it's been a bit of a slog if I'm honest.  Nothing dramatic, fancy, potentially dangerous (or expensive)... I've simply reduced my calorie intake to about 1350 a day, eating more nutrient dense food (no empty calories for me) and increased the amount of exercise I am doing.  Booooorrrring.  But there really isn't any quick or easy fix.


But maintaining such a saintly routine is hard work... I'm a strong adherent to the old adage "everything in moderation, including moderation!", because let's face it, there are times when a healthy apple just ain't gonna cut it!  So, I was really pleased when a recent culinary experiment turned out so well!  It made a healthy, nutrient-dense, low calorie treat that was also flippin' delicious!!!!  Whodathunkit!!?


The key to this dessert/treat is having over-ripe bananas.  This makes it doubly brilliant as my kids won't eat brown bananas and I hate to throw them out!  I've blogged before about how brilliant bananas are so you might've guessed I'm a fan!  Oh, and another bonus for those with dairy intolerances (or high cholesterol)... this is a vegan recipe and so is completely dairy free!!!


BANANA CHOCOLATE ICE CREAM (serves 4)

You will need...

  • 3 medium sized bananas, very ripe
  • 1.5 tablespoons of honey (you can use more or less to suit your taste)
  • 3 tablespoons of unsweetened cocoa powder
  • A food processor

Firstly, peel and slice your bananas and spread out on a lined cookie sheet.  Pop the sheet in the freezer overnight so that the banana slices have a chance to get solid.


Put the frozen banana slices in the food processor and set it running.  At first, it will look very lumpy and grainy, but persevere until you end up with a smooth soft ice-cream-like consistency.  Add the honey and cocoa powder and process some more until completely incorporated.  Taste and adjust flavours as necessary.


Pour the soft banana mush into a freezer-proof container, label and return to the freezer to re-harden.


After a few hours (or overnight), the consistency will turn into an ice-cream-like consistency and you can use an ice cream scoop to serve.  Perfect on it's own, or in a wafer cone with some chopped nuts & chocolate sprinkles for a special treat!


This makes enough for 4 servings, but you can scale the recipe up or down depending on the number of bananas you have!


And here's the nutrition information in case you are counting calories like me!!


[ Read More ]

Posted by Mama Max - - 9 comments


Silent Sunday


[ Read More ]

Posted by Mama Max - - 2 comments

Another Halloween is fast approaching, and the Big One has come up trumps again with another costume request that initially confused me.  Last year he wanted to be the Lego Ninjago master Sensei Wu and after a bit of investigating, I was able to make a costume for him, much to his delight.  This year, he asked to be Ash Ketchum.  I initially wondered why the dickens he wanted to go as the former husband of Demi Moore, until I realised that I was getting confused with Ashton Kutcher... an easy mistake to make if you are not up to date with the fads and obsessions of your average 7 year old!  Ash Ketchum is of course the main protagonist of the popular Pokemon series of manga/anime cartoons and all the related card games/merchandise that has become the Big One's raison d'etre.  He's also the 'trainer' of the iconic Pikachu  pokemon character.

So this year's costume has been coming together over the last few weeks.  You can actually buy Ash Ketchum costumes (unlike the Sensei Wu dude from last year), but as with a lot of these things, they are quite expensive and often "one trick ponies". I like the idea of adapting 'normal' clothes into costumes so that the kids can get some wear out of them.  The Big One's school has also changed it's policy for Halloween costumes, requiring that the children change into their costumes at school rather than go in already dressed up.  With fiddly fastenings I figured this was a recipe for disaster.  Plus, as a 'normal' 10-year old boy, Ash Ketchum's clothes are relatively straightforward as a costume goes.  Blue jeans, black-t-shirt, white/blue shirt, sneakers, baseball cap & fingerless gloves!  All quite easy.  So really, it's just a case of getting the details right to pull the outfit together.  I've detailed all of the parts of the costume that I purchased below... but I thought I'd also include a quick tutorial on how to make your own Pokeball... one of the key accessories to making this costume work.  You can buy Pokeballs, but they were about $10-15 for a 2.5" diameter foam ball ... and I just couldn't bring myself to spend that sort of money on it when they are so easy to make!


You will need...
  • A red ball, plastic or foam, approximately 2-3" in diameter.  I used one that came from a ball pit set.
  • White acrylic paint, or nail polish, or gloss paint.
  • Paintbrush
  • Black craft foam or paper
  • A white plastic bread tag (or more craft foam)
  • Scissors
  • Glue

Firstly, paint half the sphere of your ball white (you could use a white ball and red paint if you preferred).  Allow to dry, and apply another coat if necessary.


Cut a strip of black craft foam about 1/2" thick and glue around the middle of the ball, over the top of the edge of the paint.  Leave a gap of approximately 1" where the ends meet.


Cut a circle of black craft foam 1" in diameter and glue into the gap.


Using an old bread tag (or some white craft foam), cut a circle using a penny as a template.  Glue onto the black circle.  It's as easy as that!


Once you have your pokeball made, it's just a case of putting the other details together to get the Ash Ketchum look!


I managed to buy the cap and gloves as a set on Ebay for about $20.  These were perfect and added a level of authenticity to the costume.


A black short haired wig was also required to turn my blonde Big One into a convincing Ash Ketchum.  The spiky boy's punk wig below was perfect to achieve the manga look!  Click on the image for more details.


Then, instead of the blue/white bowling style shirt, I simply paired a plain white short-sleeved shirt with a blue fleece gilet.  I lightly attached some yellow ribbon (with easily removeable running stitches) to trim the bottom and pockets.  The gilet was from Land's End and once Halloween is over, I'll simply remove the yellow ribbon and he'll be able to wear it on the occasional chilly days we have here in Texas!


Finally, Ash Ketchum wouldn't be complete without his special Pokemon, the iconic Pikachu.  We bought this plush character on Amazon to finish the outfit off.  Click on the picture for more details.


The outfit is ready and waiting to go now and I'll update this post with a picture of the ensemble after Halloween! Happy track-or-treating!!!


Update: The full ensemble for Halloween!!

[ Read More ]

Posted by Maxine Cleminson - - 7 comments


I can barely see straight I am so tired so I apologize if my writing is less than coherent. However, I am trying to keep myself awake until I can crawl into bed early this evening, so what better than a bit of blogging! The reason for my extreme tiredness is because I managed only a few hours sleep last night thanks to a trip to the Emergency Room with The Chubby Cheeks One who awoke in the night with distressing breathing problems. My immediate (and somewhat ludicrous) concern was that he had somehow inhaled a stone, having got one stuck up his nose at school earlier that day (long story)! This may seem a rather bizarre thing to consider, but he had gone to bed with no signs of apparent illness.  Apart from the standard back-to-school sniffles that we've all had this last week, he's been fine... no fever, no complaints, just a slightly runny nose and lack of appetite. And then, BAM! Out of the blue, my poor baby was literally gasping for every breath, unable to speak and getting more listless by the minute. After a worried conversation with the triage nurse at our pediatrician's office, we ended up in the ER at midnight. True to form, his symptoms alleviated slightly on the way there, but when the doctor diagnosed croup this all started to make sense. A dose of steroids finally eased his breathing and we got home in the early hours.

Croup is a common childhood ailment that causes the windpipe and voice box to constrict resulting a distinctive barking cough, hoarse throat and 'stridor' (a crowing wheeze on the in breath). The YouTube clips below give a good indication of what croup looks and sounds like:


Terrifying for a parent.

It often appears suddenly at night following mild cold symptoms.  It is caused by the same virus that causes most upper respiratory problems, such as the common cold. As such, it just needs to take it's course and in most cases it can be treated at home to ease the symptoms while it lasts (usually only a few days). In more severe cases when home treatments don't ease the symptoms and breathing is very labored, medical assistance may be required (it is always worth contacting your pediatrician for advice).

The home treatments for croup that the doctor recommended me include:
  • Cool, fresh air - wrap the child in warm clothes and go outside for 10 minutes.  If you live in a warm location, as we do in Texas, you could try standing in front of an open refrigerator!!
  • Moist air - try sitting in a steamy bathroom with the shower running hot water.  A plug in humidifier or cool air vaporizer in the bedroom may help too.
  • Give the child lots of fluids, as croup can often cause dehydration.
  • A small dose of acetaminophen (paracetamol in the UK) or ibuprofen may help with fever and sore throat.
  • Avoid over the counter cough & cold medicines as these can constrict the airways further.

However, with a very sleepy and sick boy today, the last thing I wanted to do was drag him out to Target to buy a (no doubt expensive) humidifier.  Back in the UK, we had wall mounted hot water radiators providing our home central heating, and so when any of us were suffering with congestion or colds, it was a simple matter of placing a wet flannel or small dish of water on the radiator.  The moisture would evaporate into the air providing a simple means of humidifying the room.  Here in Texas, nighttime temperatures are rarely dropping below 65'F (18'C) even though we are in October, so most houses here have air con rather than radiators!

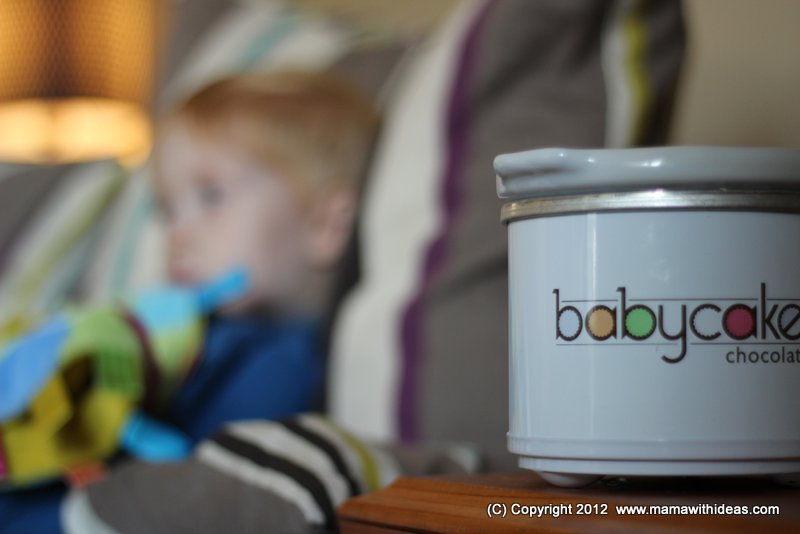
However, I've come up with a useful alternative to an expensive humidifier... a slow cooker or crock pot filled with water and set on the 'low' or 'keep warm' setting!   In fact, I am using a miniature version designed to melt chocolate, but you could even use a fondue maker! My chocolatier is perfect because it only gets hot enough to melt chocolate rather than bringing the contents to the boil. The idea is to gently warm the water in a container so that it evaporates into the air, and these kitchen appliances are designed to gently warm the contents up and maintain a low simmer.  Perfect.


If you have curious mobile children in the room where you require the humidifier, you may need to ensure it is up high out of reach.  Or even use it in the room for a few hours prior to the child's bedtime and then remove it once they go to bed. Some crock pots are quite hot to touch and actually bring the liquids to a low boil, so use your judgement to ensure the child's safety.
I used a few drops of Olbas Oil in the water in mine to further ease the little man's congestion, but Vicks Vapor product would work just as well.


I know it's "that time of year" when the kids start dropping like flies, and so I hope that we'll be back to normal in a few days. Stay well and thanks for reading!

[ Read More ]

Related Posts Plugin for WordPress, Blogger...