• RSS
  • Facebook
  • Pinterest
  • Twitter
  • Google+
Showing posts with label cookies. Show all posts
Posted by Mama Max - - 0 comments

May the 4th be with you!!!!  Yes... this Friday is a day held very dear to us geeks... Star Wars Day!

So I thought I'd celebrate by sharing some of my Star Wars food ideas so you can enjoy a galactic feast on this special day!


1.  Darth Maul-teser cake


2.  Yoda Cookies


3.  Darth Vader Sausage Rolls


[ Read More ]

Posted by Maxine Cleminson - - 5 comments

Over the last few weeks, the Shouty One & the Chubby Cheeks One have developed a pash (bordering on obsession) for Scooby Doo.  I am slowly being driven insane by the constant refrain of "Scooby dooby doo, where are you?" being sung over and over again like a mantra ... seriously, it's like water torture!  Thankfully, it is at least a TV show that all 3 of my boys can enjoy together.  Because until now, we've either had the Big One complaining that "Thomas the Tank Engine is for babies" or me trying to explain to the Big One that "Harry Potter is a little bit scary for 3 year olds!".  So for the time being, peace reigneth... at least while the telly is on!

So, when I was in the baking section of my local craft shop picking up supplies for my Earth Day cake balls, I was delighted to discover a pack of Doggy-themed cookie cutters.  Perfect for Scooby Snacks (or Snax if you prefer to be 'groovy' like Shaggy!).  But what sort of cookie is a Scooby Snack?  I wasn't convinced that a plain sugar cookie or gingerbread recipe was really right one for the job.  In my mind, they needed to be a bit 'chewier'!  Therefore, I came up with this recipe from my notebook of hastily scribbled gems... unfortunately, I have no idea about the origins of this recipe, but I had wanted to try it for ages and now had the perfect excuse.   It's a bit like a crossover between a sugar cookie and an oatmeal flapjack... either way, it's delicious and made with some whole grains too (so not too bad in moderation!).


By the way, the Big One asked if dogs like Scooby Doo could eat these Scooby Snacks... and while they probably could (although don't quote me on that!) I'm not sure how healthy they would be for dogs.  Therefore, I thought I'd include a more tried-and-tested recipe for making your own homemade doggie treats, so if you found this page looking for a dog treat recipe, you'll have to scroll to the bottom of the page!

For Kids' Scooby Snacks, you will need...
  • 1 cup (2 sticks or 8 ounces or 225g) unsalted butter
  • 3/4 cup (160g) packed light or dark brown sugar
  • 1 large egg
  • 2 teaspoons vanilla extract
  • 3/4 teaspoon salt
  • 1/2 teaspoon baking powder
  • 1 teaspoon ground cinnamon
  • 1/2 teaspoon ground ginger
  • 2 cups (225g) unbleached all-purpose Flour
  • 1/2 cup (65g) wholewheat flour
  • 1 cup (100g) old-fashioned rolled oats
  • Dog-themed (bone or similar) shaped cookie cutters like the ones below...


Preheat your oven to 350'F (175'C) and get your ingredients ready... especially, if you have little people helping!  


Firstly, beat together your soft butter and sugar (with an electric mixer is easiest).


Then, add the egg, vanilla, baking powder, ginger & cinnamon and beat again.


Add both flour & oats, and continue to mix (you can continue to use your electric mixer).  It may look like it won't form a dough, but keep going and it will come together.


This recipe yields about 48 cookies (rather a lot of Scooby Snacks for one sitting, even if you do have the munchies like Shaggy & Scooby doo)!  Therefore, you may want to divide the dough into two.  Wrap both balls of cookie dough in plastic wrap or a ziploc bag... I then refrigerate one for use in an hour once chilled, and freeze the other for use another day (defrost in the fridge overnight)!


Once the dough is chilled and firm, simply roll out on a floured surface, to approximately 1/4' thick.


Use your favourite doggy-shaped cutter to cut out the cookies.  Re-roll the scraps and keep cutting.


Place the cookies on a baking sheet lined with baking parchment (or a silicone baking mat like me).  They do not spread during cooking so you can pack them together quite closely.  You can sprinkle with cinnamon  & granulated sugar at this point if you like!


Once the cookies are all cut, pop the baking sheet in the preheated oven for 9-11 minutes... the shorter the cooking time, the softer the cookie will be.


Once out of the oven, allow to cool on the baking sheet... this will allow them to firm up.  Enjoy with a glass of milk and put your feet up to watch an episode of Scooby Doo!  They are tasty as they are, but can also be frosted if you prefer.  If you show more restraint than Shaggy & Scooby Doo and don't eat them all at once, you may want to store them in an airtight container!


For Dogs' Scooby Snacks...

  • 2-1/2 cups (335g) wholewheat flour
  • 1/2 cup milk
  • 1 cup (115g) cooked ground beef or turkey, drained and cooled
  • 1 large carrot, grated
  • 3 tablespoons of dripping, lard or shortening
  • 1 egg
  • 1 teaspoon Bovril (or 1 beef bouillon cube/Oxo cube)

Preheat the oven to 350'F (175'C). Lightly oil two cookie sheets.
In a medium bowl, sift the whole wheat flour. Add the ground pork, carrot, shortening, Bovril (or beef bouillon) and egg; mix in to the flour mixture while gradually adding the milk to form a stiff ball of dough.
On a lightly floured surface, roll the dough out to 1/4" thickness. Cut into desired shapes using cookie cutters, and reroll scraps until no dough is left. Place cookies 2 inches apart onto the prepared cookie sheets.
Bake for 25 to 30 minutes in the preheated oven, or until the bottoms of the cookies are browned. Allow cookies to set for a few minutes on the cookie sheet before removing to wire racks to cool completely.
Store in an airtight container when fully cooled.

[ Read More ]

Posted by Maxine Cleminson - - 0 comments

Jo, an old school friend of mine has started up her own cake making business, The Little Gingerbread House, and has been having huge success with her amazing cakes, cupcakes, cookies and other delectable delights! Go to her Facebook Page and 'Like' it to see some of the amazing edible creations she comes up with! You can also place online orders through her Facebook page ... great for expats like myself who want to send an affordable yet special gift to someone back in the UK!

She posted some of her fabulous items this week as she prepared a stall of goodies for a Christmas market, and I found myself totally inspired by her ideas! So, although this isn't my idea (which is technically, the point of my blog), it was inspired by another very creative mama! Thanks, Jo, for allowing me to share!

At this time of year, there's a lot of commercialism and pressure to give gifts to a lot of people... especially here in the USA, where the etiquette for tipping and gift giving at Christmas extends to just about everyone (that makes us Brits sound like right stingy so-and-sos... we're not, honestly)! So, this is an easy solution for a gift that shows you care for and appreciate someone, without it costing an absolute fortune, and without buying into the overly packaged, gimmicky nonsense marketed in the stores at this time of year!

The idea for this gift, is that you give someone a jar full of all the dry ingredients (weighed, measured & sifted), plus the instructions so they can bake their own fresh cookies! You can also accessories with wooden spoons, or cookie cutters! The recipient may need to add an egg, some butter, oil or syrup depending on the cookie recipe that you make, but the rest is fully prepared! Essentially, like a Betty Crocker packet, but prettier, with wholesome ingredients and prepared with love (tee hee)! I think it's a lovely personal gift, that shows thought and effort. Plus, it can be tailor-made to suit your recipient (using gluten free flour for those with allergies for example!).

At this point, I should say... if you are The Big One's teacher... look away now!


Gingerbread Man Cookie Mix Jar

You will need...

  • A 1 quart (1 litre) Mason/preserving jar... either the kind with the screw top or the rubber seal/clip. These are readily available in stores and are very good value. I bought mine for $1.50 in a large craft store locally.
  • 1 yard of pretty, festive ribbon - look in the discount bins in the craft store... I got a great selection for just $1 each!
  • 1 themed cookie cutter - bargain at 99c!
  • 2 cups (250g) all purpose (plain) flour
  • 1 teaspoon baking powder
  • 1 teaspoon baking (bicarbonate) soda
  • 1 cup (200g) dark brown sugar
  • 1 1/2 cups (190g) all purpose (plain) flour - and yes, I do mean to repeat this ingredient!
  • 2 teaspoons ground ginger
  • 1 teaspoon ground cloves
  • 1 teaspoon ground cinnamon
  • 1 teaspoon allspice

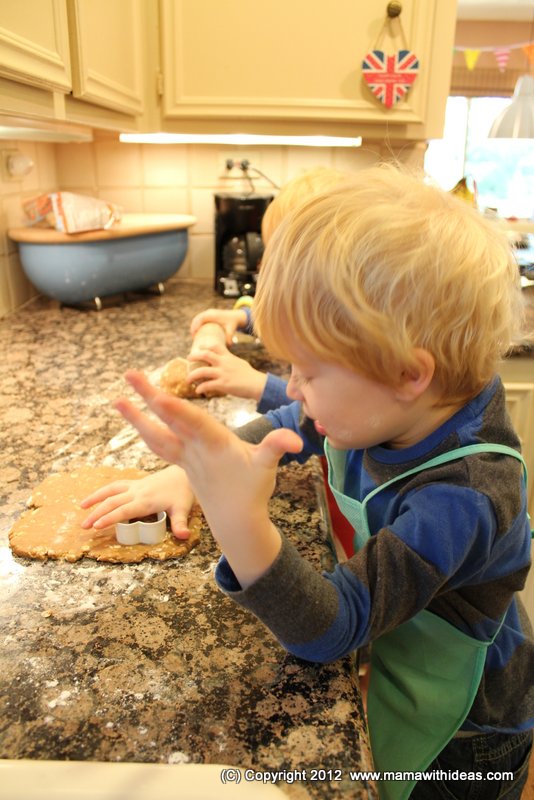
Firstly, sift together 2 cups of all purpose flour with the baking powder and baking soda.  Then spoon into the jar.  Shake to settle it as much as possible, and then press it down... the end of a rolling pin is useful for this.  You will need to do this to make sure you get all of the ingredients in the jar! The ninja headband sported by The Big One is, of course, optional!


Next measure 1 cup of dark brown sugar, spoon into the jar and pack down again.  Lastly, sift together the remaining 1 and a half cups of flour with the spices.  Spoon into the jar, pressing down as necessary.


Seal the jar and then decorate with ribbon and tie on any accessories, such as cookie cutters or wooden spoons, that you want to include.


You will then need to provide the recipient with instructions on how to use their cookie mix.  The Big One created a handwritten masterpiece, but you could copy and paste the text below and create a sticky printable label or a printout tag with festive clip art!


The full instructions are as follows:

1. Empty contents of jar into a large mixing bowl. Stir to blend together.
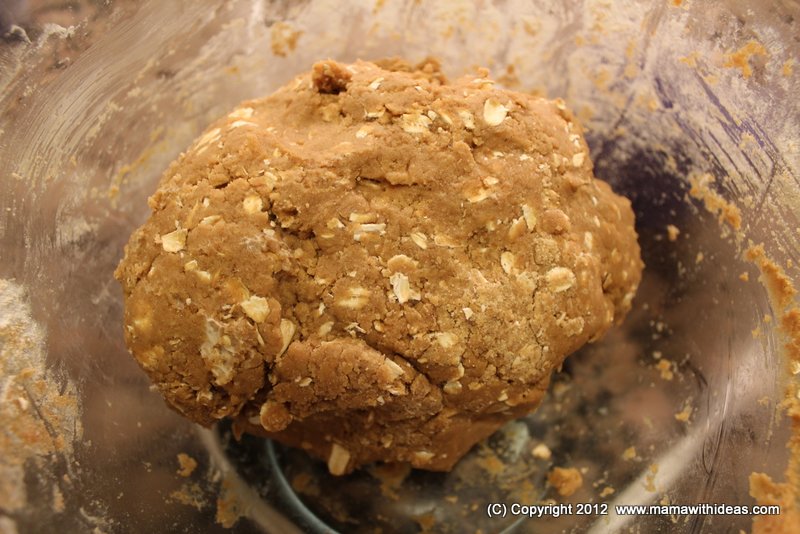
2. Mix in 1/2 cup softened butter or margarine, 3/4 cup molasses, and 1 slightly beaten egg. Dough will be very stiff, so you may need to use your hands. Cover, and refrigerate for 1 hour.
3. Preheat oven to 350'F (175'C).
4. Roll dough to 1/4 inch thick on a lightly floured surface. Cut into shapes with a cookie cutter. Place cookies on a lightly greased cookie sheet about 2 inches apart.
5. Bake for 10 to 12 minutes in preheated oven. Decorate as desired.

This idea works brilliantly for all types of cookie recipes, and even things like brownies! Adapt the recipe/instructions/accessories however you like!

To make things as convenient as possible for your recipient, you may wish to supply some of the other items.  For example, we decanted 3/4 cup of molasses into a clean jar (an empty cake sprinkles pot was the perfect size) so that The Big One's teacher only needs to provide and egg and some butter to make the cookies!  We also included a small pot of festive decorating sprinkles (in the Dollar section at Target!).  Finally, put all your items together with some tissue paper in a gift bag (we even made a gingerbread man shaped gift tag for our bag!), and you have a thoughtful, affordable gift that someone will truly appreciate!


And of course, if you're weighing out the ingredients anyway... it'd be rude not to whizz up a batch of your own cookies!  What a fun activity to entertain the kids and some friends than to spend some time decorating your own gingerbread man.  Just mix up some simple powdered icing sugar with a tiny bit of warm water, and provide a variety of sprinkles and candies for the kids' to get creative with!  Paper cupcake cases are great for this!


[ Read More ]

Posted by Maxine Cleminson - - 1 comments

Okay, confession time.  I've always been a big fan of Star Wars... I'm a child of the late 1970s so I didn't really stand a chance against it!  Him Indoors is also a big fan and happily introduced the Big One to the saga at the earliest possible opportunity!  Male bonding, and all that!  So, when the Big One asked for a Star Wars themed 4th Birthday party a few years ago my interest in Star Wars food was piqued.  At the time, I stumbled across an amazing book called 'Wookiee Cookiees: A Star Wars Cookbook' which inspired the party food creations for that occasion!  It's out of print now, but is still available on Amazon (see link at bottom of post).


However, a recent discovery in Williams & Sonoma - Mecca of foodie-type gadgets and accessories for cooking enthusiasts like myself - has set me off on an unparalleled Star Wars cooking spree!  Star Wars cookie cutters... awesome, or what?!!  


The set comes with 4 designs: Darth Vader, a Storm Trooper, Boba Fett and my favourite, Yoda!  The cutters themselves are sharp and efficient and come with a spring-loaded stamp so that you create an imprint of the character's face without having to decorate the cookies once baked.  This is particularly effective if you use food colourings to dye the dough first!  The set comes with a recipe for sugar cookies which I found worked well and tasted good, however, I have tweaked it and created my own recipe below!  Things to remember that help the cookie cutters work well: chill the dough before use and dip the cutter in flour (shaking off excess) between cuts!


Yoda Cookies
3 cups (US) or 360g (UK) wholewheat flour
1 teaspoon baking powder
pinch of salt
1 cup (US) or 225g (UK) butter, softened
1 cup (US) or 225g (UK) caster sugar
1 egg

Optional:
zest of 1 lemon
2 tablespoons of ground flaxseed (ground linseed in the UK!)
1-2 teaspoons of green food colouring


First sift dry ingredients into a large, roomy bowl.  In another bowl put the softened butter and sugar and beat with an electric mixer (or by hand if you can be bothered) until creamy.  Add the egg and beat in.  At this point you can add your food colouring and mix until you get a nice Yoda-ish green!  I also add the lemon zest at this point, but this is up to you!


Then add your dry ingredients bit, by bit.  I used my electric hand mixer for this task until the dough started to come together.  The flaxseed is also an optional extra, but I like to add it to baked goodies because of the additional dietary benefits.  Him Indoors has a propensity towards high cholesterol, so the high levels of Omega-3 fatty acids and dietary fibre in this superfood mean this treat can be enjoyed with less of a guilty conscience!  Well, that's the theory anyway!


Bring the dough together into a ball.  At this point, I separate it into two balls, one to be frozen for use at a later date... the recipe above yields 48 Yoda sized cookies and there are only so many Yoda cookies you can eat in one sitting, believe it or not!  Wrap in plastic wrap/clingfilm and chill for at least an hour or two, but preferably overnight!


As mentioned above, there's a few techniques that help when using the spring loaded cookie cutters.  Firstly, chilling the dough first is essential as it gives a firm texture and sharp lines to your outlines/imprints.  Secondly, rolling the dough to an even 1/4 inch helps.  Too thin and the cookies become fragile.  Lastly, I found that dusting the inside of the cutter with flour before (and between) cutting cookies really helped to prevent sticking.  Just make sure that flour doesn't get stuck in the grooves - a quick shake helps!


Line a baking sheet (or 3) with greaseproof baking paper and ensure that your cookies are well spaced with at least an inch around each one.  Here in Texas, the heat and humidity are ridiculous even at this time of year and so I've found that re-chilling the cut cookies at this point really helps them to maintain definition.  Just half an hour in the fridge really helps.  


Preheat the oven to 350 F (180 C), and then bake for 8-10 minutes depending on your oven.  Once done, cool on a wire rack before allowing your young Padawan's to enjoy them with a glass of blue milk!  Another idea... sandwich two cookies together with buttercream icing or vanilla icecream for an extra treat!  As Yoda would say, "Yummy, they are.  Hmmmm?!"


[ Read More ]

Related Posts Plugin for WordPress, Blogger...