• RSS
  • Facebook
  • Pinterest
  • Twitter
  • Google+
Showing posts with label school. Show all posts
Posted by Maxine Cleminson - - 0 comments


1. Get prepared in advance

Do your research now, while the little blighters are still at school! Look up local attractions and events calendars (try your local newspaper's website, local parks, libraries, cinemas etc...) so that you can plan a schedule of things to do in advance! Use a paper diary/calendar, use your calendar on your smartphone, or create one in Microsoft Publisher. Put together a calendar of events for your family, even if it's only a loose schedule. It gives you things to look forward to and to plan around.

Also, consider putting together a 'Ready To Go' bag! See the blog I wrote on this last summer.


2. Set a routine, and stick to it... sometimes at least

The temptation may be to let things slide. Lay-ins in the morning, late nights, mooching around and skipping chores are a wonderful prospect when you and the kids are exhausted getting towards the end of the school semester, but in my experience, too many unstructured days are a recipe for disaster. Try to have a flexible routine. Perhaps a later start in the morning, but still an expectation to be up, dressed and ready for action by a certain time! You could set aside certain times of the day for specific activities... for example, outdoor activities in the morning before it gets too hot, and then maybe, quiet time activities for an hour after lunch. Also, have set days of the week for certain activities, e.g. Monday is library day, Tuesday is for baking (you can incorporate a trip to the grocery store before hand and get the kids to help with the shopping for ingredients), Wednesday is for playdates, Thursday is Movie Day, etc...! Kids and adults benefit from structure and without it, the 100 days of summer hols become a haze!


3. Home school

Yes. You did read that right! Two and a half months off will undo a lot of the progress your child will have made academically if they don't utilise their little brains. Set aside a 30 minute chunk of the day (maybe at a regular time slot ... see point 2 above) to do some school work. It doesn't have to be dull as dishwater and can be fun! Try educational puzzles and games, video games, online resources and activity packs. Just a little bit of educational activity a day (especially if it revises stuff they have been doing at school) and it will keep their brains limber ready for the start of the new academic year. Just make sure you start as you mean to go on. If it's part of a daily routine established at the start of the school holiday there will be fewer complaints!

Check out these great workbooks and video games.


4. Play dates and reciprocal babysitting

Before the last day of school, exchange contact details with some of your child's classmates' parents. Take the initiative and organise a park play date for the first week off school with a few families and then organise a schedule with the other parents for the weeks ahead! You could even take the play date thing one step further. If you have friends with children a similar age you could set up a weekly play date swap. This enables each parent to have some well-deserved child-free time to run errands or just relax. For example, you could arrange for your children to go to a friend's house for a few hours on a Tuesday and then return the favour looking after their kids on a Thursday. The kids have friend's to play with (and so pester you less) and you get a few hours to yourself each week. Everyone's a winner!


5. Themes & projects

You could set a weekly theme and base all your activities around that theme. For example, you could have a farm theme... visit a farm park with another family, plant some vegetable seeds, bake a carrot cake, do some garden themed literacy/numeracy/art activities and etc... You could get each child to keep a summer holiday scrapbook, keeping photos, mementos and artwork from each week together.

6. Bribery

When all else fails and the kids are driving you crazy, don't feel bad about resorting to bribery! Just be sensible about it. Try using charts where the kids have to work towards getting a reward. Set out your expectations clearly first and agree the reward in advance. Think outside the box when it comes to a reward. You could treat the kids to a frozen yoghurt after a trip to the park on a Friday afternoon for good behaviour throughout the week rather than a monetary amount, candy or material object. Stick to your guns though, and only reward the behaviour that has been asked for! For more ideas check out my earlier post which includes a printable LEGO reward chart I created.

7. Camps

Summer camps can be really expensive, especially if you have more than one child. However, they can be a good option, especially for older kids with specific interests.


8. Low-cost options

If you have more than one child, summer camps can become cumulatively and prohibitively expensive. Short of picking your favourite child and only allowing that one to attend a camp, you could limit them to one week each, or just avoid them completely and come up with your own low-cost activities. This can be especially fun if you join up with other families. Suggestions:

- Use your local library - and not just for borrowing books. Many have free story times and activity classes you can sign up for.

- Local businesses sometimes have free kids' activities: Lowes DIY stores have a free build-and-grow scheme where kids can do building projects, Barnes & Noble hold free story times and etc...

- Parks - are a brilliant option. Many have play equipment, even splash pads, suitable for a wide range of ages. They also often have restrooms and picnic facilities... great for a change of scenery when the kids are driving you crazy, and even better when you meet friends for a play date!

- Museums and galleries sometimes have free days. Do your research ahead of time (see point one)!

- Cinemas often run a summer program of matinees for low cost. They won't be new releases, but you can see family favourites for just a few bucks! Treat the kids to some popcorn to make it a special (low-cost) occasion!

- Visit the dollar store and select some art supplies for a project.

- Get an annual pass to a favourite local attraction. For example, you can buy a family pass a local zoo for about $80 and visit as many times as you like throughout the holidays!

- Create a den or pitch a tent in the backyard (or in the house if the weather is bad)!

- Visit the beach, local nature reserve, woodland or river and get closer to nature!

- Try geo-caching to make walks and bike rides more exciting!

- Volunteer - find a local food bank, nursing home, or animal shelter and spend some of your summer holiday doing something worthwhile with your kids!

9. Remember... it's a holiday!

After a full-on academic year, you and the kids will need some time to relax. Don't try to fill every moment with activities or you will end up exhausted and needing to go back to school for a break. It's okay to have days with nothing planned. Let (insist) the kids play on their own sometimes... it's important that children learn to use their own imaginations and initiative. Trot out that really annoying line that your own parents used: "Only boring people get bored"! It's not true of course, but sometimes a little boredom is unavoidable and you should not feel obliged to entertain the troops continually!

10. Drink...

After a particularly stressful day with the kids... treat yourself to a glass of wine once they've gone to bed and remember the holidays won't last forever!

[ Read More ]

Posted by Maxine Cleminson - - 0 comments

The Chubby Cheeks One is four, and a reluctant writer. In fact, he's a reluctant artist too and is just the sort of kid that would rather be playing active games than sitting practising early learning skills like holding a pencil, using scissors or learning to write his name. It's not that he doesn't enjoy school (he loves it) - he knows his 'wetters' [sic], loves books, singing and many of the other activities at pre-school. He just does not particularly enjoy trying to write. Apparently, it's not just with me either. His pre-school teacher has made a few comments about his refusal to participate in these types of activities (he often politely tells her "I just can't do it") and it's something she would like us to work on with him.

I'm sure that some of it is just that innate competitive boy thing... if it's something I'm not instantly good at, I don't want to know!!! I am very familiar with this attitude from dealing with the Big One (soon to be 8... eeek!) who is very motivated by instant success and is not good at persevering with activities that take practise to master. He will never be a musician for this reason!

But we have been trying to encourage our youngest to be more interested in learning penmanship, and I thought I would share some of the better resources we have come across.


Image courtesy of David Castillo Dominici/www.freedigitalphotos.net 


TRADITIONAL WORKBOOKS
I purchased some of the Kumon series of workbooks aimed at preschoolers on the recommendation of a friend. I was a little skeptical as to whether my boys would be interested at all in something so 'school-like' and traditional, but was actually pleasantly surprised. The "My First Book of Tracing" workbook (click on the picture below for more information) was higher quality than I was expecting. In fact, the first thing the Chubby Cheeks One said was: "I'm not supposed to draw on books, just paper". The workbook pages are thick with colorful illustrations and very different to the worksheets he is familiar with from school. The activities themselves start out very easy and I was initially concerned that the level was not going to be challenging enough. However, the instant successes from the 'easy' early pages really gave my little one a confidence boost so that he was keen to continue. In fact, I had to rein him in a little or he would have raced through the whole book in one go! The activities become harder and more complex as the book goes on and do require greater concentration and dexterity. Overall, I was very pleased with this activity book and have ordered others since. They are particularly useful as a short 5-10 minute quiet activity.

To assist with his pen holding, I bought some pencils with a triangular shaped body to help him develop the correct grip.


APPS
Him Indoors loves his technology & gadgets and this is something that all three of my boys have inherited along with their Y-chromosome! Getting to use Daddy's iPad is a rare treat in our house and one that we have not encouraged. I worry that the kids have too much screen time as it is, without adding another source! However, now that the twins are 4, I wondered whether they might find the prospect of being able to use Daddy's iPad a motivation to practise their writing skills! First things, first. An iPad is an expensive 'toy' and like all kids, ours are known for their occasional clumsiness! So we invested in a protective case for the device. There are many cases designed with kids in mind, but we chose the M-Edge Supershell Case. We chose this one over the rest because of several reasons. Firstly, the design of this case allows access to all the ports without removing it, so you can use headphones with it on (something I was keen to have for when travelling)! You can also easily adjust the volume buttons through the foam. The foam itself is dense and protective, fitting very snugly. However, it isn't so bulky or cumbersome that an adult wouldn't want to use it too. Click on the image below for more information.


We also invested in chunky stylus with a triangular shape like the pencils above. While not cheap, I felt it was worth the investment as practising using a 'pen' was the point of the activity rather than just a fingertip. Again, click on the image to find out more.


With the hardware sorted, we were able to download a couple of 'games' for the boys to try. I used the very useful website, Commonsense Media, to lookup apps with good reviews. You can search for games by device (iPad, Kindle, iPhone etc...), by age, and by skill or topic. You can then read reviews and decide which one you like before downloading. Very handy! Click here for their app search!

My kids' favourite app for tracing has got to be the Little Writer app by Alligator Apps (Innovative Mobile Apps Ltd). The music is appealing but not grating. The game encourages the kids to trace the letters by following a trail of themed dots (so if the background is the ocean, they follow fish)! The activities include writing uppercase and lowercase letters, numbers and shapes. But the game the boys enjoy the most is the one where they get to write basic words. If they trace the letters C-A-T carefully and correctly, they are rewarded with a picture of a cat! The only thing I wish it would do in this activity is sound out the letters phonically (rather than by name) as they are writing them so that the kids can start to make the connection between the sound a letter makes and the word being written. However, for the purpose of practising using a pen and writing letters this app is great and my little ones love it!


PRINTABLES
One of the things we have been asked to work on with our twins is getting them to write their names independently. The Shouty One has pretty much mastered this and can independently write his name correctly. We are still working on it with the Chubby Cheeks One and I was delighted to find a free resource online that allowed you to create and print your own traceable worksheets. At www.kidzone.ws you can select whether you want block, script or cursive font and input the text you want the child to practise writing... once submitted a custom printable is created! So easy!


How do you encourage your reluctant writer?!


[ Read More ]

Posted by Maxine Cleminson - - 0 comments

It's that time of year again, folks! I'm talking about that time of year when you have a lot of people to buy gifts for to thank for their help throughout the year... teachers, neighbors, babysitters, cleaners etc... The thing is that this can often get expensive and so it is always nice to find a great idea for a relatively inexpensive gift that punches above its weight! This year I have 5 teachers to buy for now that the twins have started school and so things are getting even costlier!

Last year I made a cookie mix in a mason jar to give to the Big One's Teacher as a little gesture of thanks at Christmas... it was a cute little extra to go along with the gift card we gave her! However, the cookies were a one time only gift... once the mix was used that was it. So, I was looking for something that had a bit more longevity! The answer came in the form of the brilliant 1-2-3 cake in a mug mix I made earlier in the year thanks to a Pinterest find. I love this easy mix for its simplicity and relatively guilt-free treat! What better?
To make 5 gifts you will need...

  • 5 x 16 oz (1 US Pint) mason jars ... I bought mine in the Dollar Store!
  • 2 x box mixes of Angel Cake
  • 2 x box mixes of another cake variety (I used Betty Crocker Devil's Food Chocolate cake)
  • 5 x Xmas themed mugs (again from the Dollar Store)
  • 5 x tablespoon measures (again from the Dollar Store)
  • Ribbon in a Christmassy colour
  • Adhesive labels to stick on the jar (see link below)
  • 5 x brown paper gift bag
  • Brown paint
  • Red Paint
  • Black marker

First off, make up the cake mix in a gallon sized freezer bag.  See the details here. Carefully spoon the mix into the jars, shaking to settle if necessary.  Close the lid carefully, and tie a tablespoon measure around the neck of the jar with the ribbon ... tie in a bow. Decorate the paper bag... we made reindeer handprints!

Label the jar with an adhesive sticky label... write the instructions on the label.  You can use the printable attached here with the sticky labels below.


Put it all together in the gift bag with some shredded paper and colored tissue paper!  Et voila!


[ Read More ]

Posted by Maxine Cleminson - - 0 comments


Silent Sunday

[ Read More ]

Posted by Maxine Cleminson - - 0 comments

My kids all went off to school today!!!! After 87 days of having them trailing me around like shadows, I honestly felt a bit bereft to be without them... saying that, I'm sure the feeling will pass! In fact, today was actually the twins' first day at proper school and so was actually a bit of a milestone for us! Cue lots of photos and the odd tearful moment (me, not them!).


It's going to be a bit of a culture shock managing 3 kids' school timetables rather just the Big One's and so I am on a mission to get organised! All 3 boys have come home with a folder full of notices, art work and class timetables today and my fridge and noticeboard are at full capacity... so I decided to create a streamlined magnetic display for the boys class information to maximize the noticeboard real estate!


You will need:
  • a clear plastic wallet for each child
  • sticky tape
  • small post-it notes (the tab divider ones work really well as they are clear on the bit that attaches to the page)
  • scissors
  • coloured paper & glue stick (optional)
  • a strip of magnetic tape (alternatively you could just use strong fridge magnets or pins on a normal noticeboard)


Firstly, bind all your wallets together along the hole punched edge using sticky tape.


Then you can cover this with a folded strip of coloured paper or card to neaten the edge.


Cut, peel and stick a length of magnetic tape to the covered edge of the wallets.


Using post-its or special sticky index tabs, create a tab for each of your kids on each of the wallets along the opposite edge from the covered magnetic side.


Slide in each child's timetable and then attach to your fridge door or magnetic noticeboards using the magnetic tape.  You can then simply use the tabs to locate the specific timetable you need at the time without having to cover your entire fridge door with paper!


How are you gearing up for the return to school?!!!
[ Read More ]

Posted by Maxine Cleminson - - 6 comments

Here in Texas we're nearing the end of the school year (yes, really) and all I can say is... "phew, at last!".  I'm sure i'll be eating my words when the summer is dragging on and the boys are driving me crazy, but this semester has dragged on with barely any respite since Christmas.  Unlike the UK, where the kids get a 2 week break for Easter and a mid-term week off either side of that holiday, here in Texas we slog it out from the beginning of January with just Spring Break in February.  We are exhausted.  And I am particularly fed up of the morning chore of getting packed lunches made.  What a faff, and such a drain on my time when I am struggling to get the boys (and myself) up, dressed and breakfasted as it is.  I am also looking forward with a bit of dread to the new school year starting in August, when all 3 of my boys will be attending school every day and will need uniforms ironing and lunches made... bah!  At the moment the twins only go twice a week and don't start until 9.30am giving me time to sort out the Big One and get him safely delivered to school before I even contemplate getting the little ones ready!  So I am going to need to streamline and organise the process.  

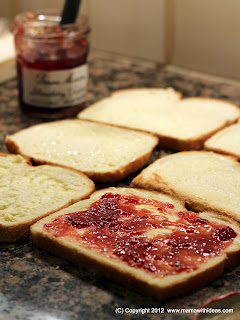
With this in mind I bring you the results of a trial I have been undertaking... frozen sandwiches made ahead of time.  The idea was inspired by my younger brother, Gavin, who undertook an mechanical engineering apprenticeship at the tender age of 16.  Being a slothful teenager, he would leave it until the very last minute possible before jumping out of bed and onto his pushbike to get to work.  Living as he was on an apprentice's wage, he couldn't afford to visit the greasy burger van parked outside his workshop daily like his colleagues, so resorted to making his own 'butties' at the weekend and freezing them ready to grab-and-go.  While I admired his thrifty-ness and planning, I always shied away from the idea assuming the 'sarnies' would be soggy or suffering from freezer burnt bread.

I am delighted to report that this is NOT the case, as long as you follow some golden rules!  I've split this post into sections to cover all the requirements of a packed lunch fit for a king (or prince/princess, as required)!


Part 1:  The Sandwich (a.k.a. buttie, sarnie, sub, wrap etc..)


Golden Rule #1...  The key to making this work is to make sure that you choose your fillings wisely.  Not all foods freeze well and a spell in the extreme cold can do strange things to certain sandwich fillings!

Sandwich fillings that CAN and do freeze well include:

  • Meat - cold sliced roast meats (a great way of using up leftovers after a Sunday roast), hams, cooked bacon, deli meats, salami, cooked sausages, meatballs etc...


  • Fish - tinned tuna, salmon, sardines etc... Smoked salmon or mackerel also fabulous.
  • Cheese - grated is best as freezing tends to make cheese crumbly.  All hard cheeses work well, as does Philadelphia cream cheese, Brie, Camembert, Feta and Swiss. Full fat freezes better than low-fat cheese.  (See below for some cheese exceptions!). 


  • Jams & jellies
  • Peanut butter (and other nut butters) 
  • Marmite/vegemite
  • Nutella
  • Honey
  • Pesto
  • Sliced/chopped olives, sun-dried tomatoes and capers
  • Pickles, chutneys and mustards
  • Caramelised onions, cooked aubergine (eggplant) and courgette (zucchini) slices


Even the fussiest eater must be able to find some combination of the above that works for them?!


Things that CAN NOT be frozen in a sandwich:
  • Eggs - they go very rubbery.
  • Mayonnaise - this tends to seperate in the freezer.
  • Salad, fruits & raw vegetables - go watery, soggy & limp once frozen.
  • Cottage cheese
Don't assume that because you can't include salad, raw vegetables or mayo in your salad you will have a boring sandwich (see part 2 for more ideas)!


Golden Rule #2... To prevent the bread from going soggy you will need to take preventative steps.  The best method is to use a thin layer of butter or margarine spread all the way to the edges of both slices of bread.  These help make the bread 'waterproof'!  Alternatively you could use peanut butter (or another nut butter).  This rule is especially important with sandwich fillings that are wet, like jam, honey and chutneys.  While mentioning bread it's worth noting that all types of bread work well for frozen sandwiches:
  • Sliced (white, wholemeal, granary, sourdough, rye etc...)
  • Rolls, baps, bagels & croissants
  • Tortillas and wraps


Golden Rule #3... Wrap your sandwiches individually with plastic wrap or a ziploc sandwich bag making sure to squeeze out as much air as possible.  Then store them in a larger airtight container, such as a gallon size ziploc bag, plastic tub or even the bread bag.  Again try to avoid too much air around them as this minimizes any potential freezer burn that can harden the bread.  It is a good idea to label the sandwiches unless you enjoy the idea of a lucky dip lunch!  Frozen sandwiches are good for up to about 1-2 months, but after this you will start to notice a deterioration... I suggest you make a week or 2 ahead of yourself at most (you'd be lucky to fit many more than that in your freezer anyway).


To use the frozen sandwiches, remove from the freezer the night before and place in the fridge overnight to defrost.  Or if you live in Texas like me, where it's flippin' hot most of the time, simply place in the lunchbox in the morning and it will be perfectly defrosted by lunch!  If you have access to a sandwich toaster during your lunch break, some sarnies lend themselves very well to a bit of toasting!


Part 2:  The sandwich 'extras' & alternatives!
A plain ham sandwich is unlikely to float the boat of many adults (although, this may suit many kids).  But fear not ... there are plenty of things you can do to supplement your sarnie that can be prepared in advance and either frozen or refrigerated.


Salad... While freezing your salad is a definite no-no, this doesn't mean that you can't include this in your lunch AND prepare at the weekend for the week ahead.  Simply fill small ziploc bags or plastic pots with ready prepared salad.  Just don't include the dressing and leave 'wet' ingredients like tomatoes whole (baby plum or cherry tomatoes are perfect).  You can prepare a little bag/pot for every day of the week all in advance so that when you are filling your lunchbox, you simply grab the salad from the fridge along with the sandwich from the freezer!  Then at lunchtime, simply pop the salad into the sandwich and hey, presto... a far more interesting sandwich!


Dressing... You may not be able to freeze mayonnaise IN your sandwich, but as with the salad, it doesn't have to be excluded.  You can use small pre-packaged sachets/packets of dressings - either save unwanted ones from when you eat out or get takeaway or you can buy boxes of these.  Warehouse clubs like Costco often do these at good value for money or order online.  Alternatively, 1- or 2-oz baby food storage pots are the perfect size for decanting your own condiments and this is obviously better value.


Alternatives... You'd be surprised what can be frozen in individual portions that make brilliant packed lunches instead of a sandwich:
  • Cooked slices of pizza, wrapped tightly in plastic wrap and frozen. They defrost ready for lunch like the sandwiches... and who doesn't like a bit of cold pizza!!!
  • Similarly, quiche or pie portions (my Darth Vader mini sausage rolls would be perfect for this) wrap and freeze well.
  • A portion of cooked pasta and sauce frozen in a plastic pot.  This is great simply defrosted and eaten cold or can be reheated in a microwave if available... just remember the rules of what can & cannot be frozen from the sandwiches (i.e. no mayonnaise!).  This works best when the pasta is slightly al dente, as freezing causes the pasta to soften slightly.
  • Boil a batch of eggs until hard-boiled, cool and then store in the (labelled) box in the fridge. Grab an egg or two to take in your lunch and simply peel when ready to eat!


Part 3:  Healthy bits

In addition to the main sandwich (or alternative) it is often nice to include a few extra bits.  I always try to include some healthy extras and many of these can be prepared ahead of time:
  • Prepared fruit - If you are preparing for the week ahead you can wash and prepare some fruits for use in the early part of the week.  Many fruits start to spoil within a day or two of being washed so plan to use prepared pots/bags of fruit early in the week.  For example a little pot of washed (and dried) berries and/or grapes prepared on the Sunday evening would be great to take for lunch on Monday or Tuesday.  Segmented citrus fruit will last 2-3 days as long as it's stored in a small airtight container (after that it will start to spoil).  Similarly, cut pineapple will stay good for a few days, but will end up with a lot of juice after the first day or so so may need a fork!


  • Fresh fruit - Many fruits are well designed by Mother Nature for easy transportation and can work well for older kids and (obviously) adults.  An apple only needs a quick rinse in the morning before packing in the lunchbox.  Citrus fruits have their own 'jackets' as do bananas.  If you find your bananas bruise and brown too easily, try a banana guard (I blogged about these little wonders before)!


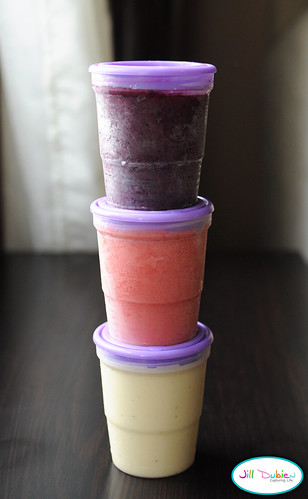
  • Fruit smoothies - Use fresh or frozen fruit, juices and/or yoghurts to make smoothies in advance.  These can be frozen in cups with lids and then defrosted in the fridge/lunchbox for a healthy & tasty slushy! Click here for some more ideas like this from www.meetthedubiens.com


  • smoothies2

  • Dried fruit & nuts- Raisins in boxes (or decanted into small pots/bags) are easy to have lined up for the whole week.   Other dried fruits and/or nuts can be purchased in bulk and divided into easily grabbed portions ready to be popped into a lunch box.
  • Fruit leathers - see my recipe for your own dried fruit leathers or roll-ups... very tasty and nutritious!
  • Yoghurts - You can buy 'tubes' of yoghurt that are perfect for lunchboxes (e.g. Petit Filous Frubes in the UK, and GoGurts or Squeezers in the US) .  They freeze brilliantly and make excellent healthy alternatives to ice lollipops.  Placed in a lunchbox in the morning, they help to keep the lunch cool while slowly defrosting in time for lunch!


  • Crudites & dips - Rather than having your veggies and dressings in your sandwich, have them on the side.  Washed and peeled baby carrots, chopped celery sticks etc... can be prepared at the weekend in small portions ready for the week.  You can buy special snack containers that have built in dip holders and are fab.  Alternatively, simply bag up the veggies and use the mini baby food pots mentioned above to decant the dips.  These can be prepared for the whole week and stored in the fridge ready to grab & go in the morning.


Part 4:  'Unhealthy' treats

A small treat in the lunchbox is often well received and they don't have to be totally 'unhealthy'!  Some ideas for prepare ahead treats are:
  • Muffins or cake - homemade or store-bought mini muffins or portions of cake can be wrapped and frozen individually for an easy to grab portion perfect for a lunchtime treat.
  • Cookies & crackers - buy in individually portioned packages, or buy in bulk and decant into small containers in advance.


On a final note, one of the best bits of advice I can suggest is to get everyone involved... get a production line going and make it a part of your Sunday evening routine... even the younger members of the family can fill a pot with crackers and do their bit!

As this is still an ongoing trial I'd love to hear any other ideas or suggestions... so please leave your comments below!  xxx

http://www.thethriftyhome.com
[ Read More ]

Related Posts Plugin for WordPress, Blogger...