• RSS
  • Facebook
  • Pinterest
  • Twitter
  • Google+
Showing posts with label homemade gifts. Show all posts
Posted by Maxine Cleminson - - 0 comments

Wow... Easter is fast approaching!  I had planned to get this post done and published well in advance of Easter weekend, but with a trip back to the UK, and the resultant jet-lagged week from hell... all the best plans blah, blah, blah!  Easter is one of my favourite holidays!  I love it because Spring is in the air (unless you're in the UK and experiencing a blizzard), the days are getting longer and it's just a lovely excuse to spend time having fun outdoors with the family.  In the US, the traditions at Easter are slightly different than in the UK.  The Easter Bunny ranks up there with good ol' Santa Claus and so an Easter Egg hunt is the cornerstone of most celebrations.  The shops are FULL of hundreds of small, cheap plastic eggs that get filled with equally cheap candy and treats which can be hidden around gardens and parks across the country for the various egg hunts that take place!

In the UK, the traditions are slightly different.  It's more about the culinary associations... a baked leg of Lamb on Easter Sunday, hot cross buns and simnel cake.  When I was a child, we would be given one large-ish chocolate egg that was filled with our favourite candies, rather than the hundreds of small filled plastic ones common here today.  In fact, my mother even had a chocolate mold in which she would make them.  And she very kindly bequeathed these chocolate molds to me (complete with the original postage box circa 1983 ... haha!).  So this year, I decided to make Easter eggs for my boys... something heartfelt and made with love, rather than tacky plastic commercialism!


And what did I come up with?  An Angry Birds Egg!!  Commercial, much?!!  :-)


You will need...
  • An Easter egg shaped candy mold like one of these below.


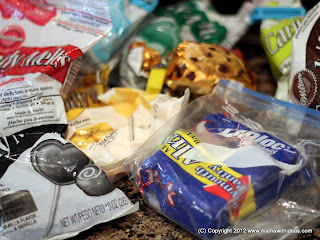
  • A variety of coloured candy melts ... if you are making the red Angry Bird like the one pictured, you will need red, black, white & yellow.  These are available in craft shops such as Michaels or online.


    • A paintbrush reserved solely for food use.
    • Some egg cups or small microwave proof dishes.
    • A cellophane bag and gift ribbon.


    Firstly, it's important to consider the process of layering the candy so you can determine the order in which to 'paint' your melted candy.  You are working from the outside in, so any surface details need to be painted on first before you cover them, so for example, pupils BEFORE whites of the eyes!

    For the red Angry bird you will need to paint the black outlines of the Angry Bird's face first.  Melt just a few black candy wafers carefully in the microwave or over a double boiler (for more information on how to melt candy successfully read this post).  Then using a paintbrush, paint the outlines of the bird's face in mirror image onto the inside of the candy mold and allow to harden.


    Next, melt just 1 or 2 yellow candy wafers in an egg cup or small dish, and paint the melted candy over the beak outline (you can cover the center line).


    Do the same for the eyes using white candy.


    You can also then mix a little of the yellow into some of the white candy to make a pale cream yellow colour.  Use this to paint the bird's underbelly.


    Melt a bowl full of red candy melts (enough to fill both egg molds 1/4 inch thick).  Mix a tiny bit of the red with some of the black you used for the face outlines and create the dark red spots on either side of the red bird's face.


    When all these features have cooled and set.  Pour in the red candy gently, working quickly so that it doesn't melt your face underneath.  Spread up the sides of the mold and put in the fridge for 5 minutes to harden quickly.  Another thin layer may be necessary to give the egg an adequate thickness.


    Turn the eggs out onto a sheet of greaseproof paper.  Use a spoon to tap the outside of the mold and gently pull the mold away.  You may need to use a sharp knife to loosen the edges.


    Once the eggs are out, try not to handle them, as your warm fingers and hands are enough to melt the candy and leave fingerprints.  Gently turn the eggs over and use a little more melted red candy around the rims of the eggs to attach the two sides together.  You could fill the inside with candy before sticking them together, for example M&Ms.


    Wrap in a clear cello bag and tie with a gift ribbon to prepare as a gift.


    Happy Easter!

    I'm now off to make some more... ideas include Spiderman, a monkey (use whole brown candy wafers stuck on the sides for ears), Darth Vader etc...    Who would you make?!
    [ Read More ]

    Posted by Maxine Cleminson - - 0 comments

    It's that time of year again, folks! I'm talking about that time of year when you have a lot of people to buy gifts for to thank for their help throughout the year... teachers, neighbors, babysitters, cleaners etc... The thing is that this can often get expensive and so it is always nice to find a great idea for a relatively inexpensive gift that punches above its weight! This year I have 5 teachers to buy for now that the twins have started school and so things are getting even costlier!

    Last year I made a cookie mix in a mason jar to give to the Big One's Teacher as a little gesture of thanks at Christmas... it was a cute little extra to go along with the gift card we gave her! However, the cookies were a one time only gift... once the mix was used that was it. So, I was looking for something that had a bit more longevity! The answer came in the form of the brilliant 1-2-3 cake in a mug mix I made earlier in the year thanks to a Pinterest find. I love this easy mix for its simplicity and relatively guilt-free treat! What better?

    To make 5 gifts you will need...

    • 5 x 16 oz (1 US Pint) mason jars ... I bought mine in the Dollar Store!
    • 2 x box mixes of Angel Cake
    • 2 x box mixes of another cake variety (I used Betty Crocker Devil's Food Chocolate cake)
    • 5 x Xmas themed mugs (again from the Dollar Store)
    • 5 x tablespoon measures (again from the Dollar Store)
    • Ribbon in a Christmassy colour
    • Adhesive labels to stick on the jar (see link below)
    • 5 x brown paper gift bag
    • Brown paint
    • Red Paint
    • Black marker

    First off, make up the cake mix in a gallon sized freezer bag.  See the details here. Carefully spoon the mix into the jars, shaking to settle if necessary.  Close the lid carefully, and tie a tablespoon measure around the neck of the jar with the ribbon ... tie in a bow. Decorate the paper bag... we made reindeer handprints!

    Label the jar with an adhesive sticky label... write the instructions on the label.  You can use the printable attached here with the sticky labels below.


    Put it all together in the gift bag with some shredded paper and colored tissue paper!  Et voila!


    [ Read More ]

    Posted by Mama Max - - 4 comments

    Parties wouldn't be parties without pressies!  Whether it's a gift for the party hostess to say thanks, or party favors or a slice of cake to send home with your guests, there are many uses for these cute and really easy bags!  I used a paper lunch bag, but you could use bags of any size and scale the design accordingly... let your imagination go wild!  You could even use the same idea for other flags and other celebrations... picture stars & stripes for the 4th July!  They could even be used as luminaria to decorate the garden for an evening street party... read on for more information.


    You will need...

    • Blue paper lunch bags (the ones I have are approximately 5" wide x 3" deep x 11" tall)
    • White paper
    • Red paper (I used some lovely 'velvet' paper I found in the craft store scrapbook section)
    • Glue
    • Scissors (or a guillotine)


    Firstly, cut your red paper into strips.  My strips were 1/2" wide, but use your judgement based on the size of your bag.  You will need 4 strips per bag.


    Then cut 4 strips of white paper... these need to be double the width of the red ones (so mine were 1" wide).


    Glue your white strips onto the bag.  Start with one going vertically down the length of the bag.  Place the 2nd one perpendicular to it to create a cross.  Then glue the other 2 in another cross at 45' angle to the first.


    Repeat with the red strips, overlaying the white ones.


    Trim the overhang with scissors to finish.  Easy peasy!


    Other variations on this idea include the following (for suggested online supplier information click on images below):


    • Fill the paper lunch sack with sand and light a small votive candle to make a luminaria (for outside use)... watch carefully and take necessary precautions to prevent fire.  Alternatively, use an empty jam jar with a votive candle inside and pop inside the bag.  For best results, use a light blue paper bag... as you can see, the royal blue was quite dark!   You can even buy battery operated votives if you are concerned about safety, particularly with children around.


    • Wine bottle totes - don't go empty handed to the party!  Use a solid colored blue wine tote and decorate as above!


    • Treat boxes for picnic lunches - decorate each box with a Union Jack for a child's easy picnic solution! 


    • Larger gift bags - scale up the design above for larger pressies!


    [ Read More ]

    Posted by Maxine Cleminson - - 0 comments

    Jo, an old school friend of mine has started up her own cake making business, The Little Gingerbread House, and has been having huge success with her amazing cakes, cupcakes, cookies and other delectable delights! Go to her Facebook Page and 'Like' it to see some of the amazing edible creations she comes up with! You can also place online orders through her Facebook page ... great for expats like myself who want to send an affordable yet special gift to someone back in the UK!

    She posted some of her fabulous items this week as she prepared a stall of goodies for a Christmas market, and I found myself totally inspired by her ideas! So, although this isn't my idea (which is technically, the point of my blog), it was inspired by another very creative mama! Thanks, Jo, for allowing me to share!

    At this time of year, there's a lot of commercialism and pressure to give gifts to a lot of people... especially here in the USA, where the etiquette for tipping and gift giving at Christmas extends to just about everyone (that makes us Brits sound like right stingy so-and-sos... we're not, honestly)! So, this is an easy solution for a gift that shows you care for and appreciate someone, without it costing an absolute fortune, and without buying into the overly packaged, gimmicky nonsense marketed in the stores at this time of year!

    The idea for this gift, is that you give someone a jar full of all the dry ingredients (weighed, measured & sifted), plus the instructions so they can bake their own fresh cookies! You can also accessories with wooden spoons, or cookie cutters! The recipient may need to add an egg, some butter, oil or syrup depending on the cookie recipe that you make, but the rest is fully prepared! Essentially, like a Betty Crocker packet, but prettier, with wholesome ingredients and prepared with love (tee hee)! I think it's a lovely personal gift, that shows thought and effort. Plus, it can be tailor-made to suit your recipient (using gluten free flour for those with allergies for example!).

    At this point, I should say... if you are The Big One's teacher... look away now!


    Gingerbread Man Cookie Mix Jar

    You will need...

    • A 1 quart (1 litre) Mason/preserving jar... either the kind with the screw top or the rubber seal/clip. These are readily available in stores and are very good value. I bought mine for $1.50 in a large craft store locally.
    • 1 yard of pretty, festive ribbon - look in the discount bins in the craft store... I got a great selection for just $1 each!
    • 1 themed cookie cutter - bargain at 99c!
    • 2 cups (250g) all purpose (plain) flour
    • 1 teaspoon baking powder
    • 1 teaspoon baking (bicarbonate) soda
    • 1 cup (200g) dark brown sugar
    • 1 1/2 cups (190g) all purpose (plain) flour - and yes, I do mean to repeat this ingredient!
    • 2 teaspoons ground ginger
    • 1 teaspoon ground cloves
    • 1 teaspoon ground cinnamon
    • 1 teaspoon allspice

    Firstly, sift together 2 cups of all purpose flour with the baking powder and baking soda.  Then spoon into the jar.  Shake to settle it as much as possible, and then press it down... the end of a rolling pin is useful for this.  You will need to do this to make sure you get all of the ingredients in the jar! The ninja headband sported by The Big One is, of course, optional!


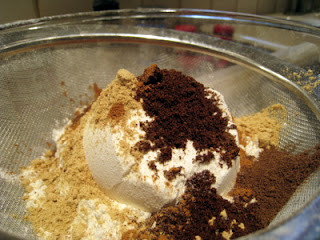
    Next measure 1 cup of dark brown sugar, spoon into the jar and pack down again.  Lastly, sift together the remaining 1 and a half cups of flour with the spices.  Spoon into the jar, pressing down as necessary.


    Seal the jar and then decorate with ribbon and tie on any accessories, such as cookie cutters or wooden spoons, that you want to include.


    You will then need to provide the recipient with instructions on how to use their cookie mix.  The Big One created a handwritten masterpiece, but you could copy and paste the text below and create a sticky printable label or a printout tag with festive clip art!


    The full instructions are as follows:

    1. Empty contents of jar into a large mixing bowl. Stir to blend together.
    2. Mix in 1/2 cup softened butter or margarine, 3/4 cup molasses, and 1 slightly beaten egg. Dough will be very stiff, so you may need to use your hands. Cover, and refrigerate for 1 hour.
    3. Preheat oven to 350'F (175'C).
    4. Roll dough to 1/4 inch thick on a lightly floured surface. Cut into shapes with a cookie cutter. Place cookies on a lightly greased cookie sheet about 2 inches apart.
    5. Bake for 10 to 12 minutes in preheated oven. Decorate as desired.

    This idea works brilliantly for all types of cookie recipes, and even things like brownies! Adapt the recipe/instructions/accessories however you like!

    To make things as convenient as possible for your recipient, you may wish to supply some of the other items.  For example, we decanted 3/4 cup of molasses into a clean jar (an empty cake sprinkles pot was the perfect size) so that The Big One's teacher only needs to provide and egg and some butter to make the cookies!  We also included a small pot of festive decorating sprinkles (in the Dollar section at Target!).  Finally, put all your items together with some tissue paper in a gift bag (we even made a gingerbread man shaped gift tag for our bag!), and you have a thoughtful, affordable gift that someone will truly appreciate!


    And of course, if you're weighing out the ingredients anyway... it'd be rude not to whizz up a batch of your own cookies!  What a fun activity to entertain the kids and some friends than to spend some time decorating your own gingerbread man.  Just mix up some simple powdered icing sugar with a tiny bit of warm water, and provide a variety of sprinkles and candies for the kids' to get creative with!  Paper cupcake cases are great for this!


    [ Read More ]

    Related Posts Plugin for WordPress, Blogger...