• RSS
  • Facebook
  • Pinterest
  • Twitter
  • Google+
Showing posts with label printables. Show all posts
Posted by Maxine Cleminson - - 11 comments

The Big One is turning 8 next month and has asked for a Lego Party so I am trying to get ahead of the game and prepare some stuff while we have a weekend at home. So I have been making party favor bags in the shape of Lego bricks... super easy and very effective. I thought I'd share the printable resource I made to make it even easier for you guys!


You will need...

  • Paper party favor bags in bold 'Lego' colours - approximately 8.5" tall x 5.5" wide
  • The Lego studs printable below in matching colors
  • Scissors
  • Glue


Firstly, you will need to print the Lego studs to match your paper bags (see the printable at the bottom of the page). I chose yellow, orange, light green and light blue in a slight departure from the royal blue, red and yellow palette so synonymous with the Lego brand, but I have included printables in a variety of colours and even blank ones to allow you to print onto your own colored paper to match your theme.  My bags were from Target and were cheap and are well made.  You can buy similar online from suppliers such as Party City or Oriental Trading.  You could also use paper lunch sacks or treat boxes in bright colours.  Click on the pictures below for similar bags available from Amazon.


Carefully cut out the circles using a sharp pair of scissors. Glue the circles onto the front of the bag using a glue stick. Line up the 'studs' with approximately 1/2-2/3" between them.


Done.


Click on the thumbnail below to open the printable PDF file.  The document contains all the colors you might need, plus a black & white outline one in case you choose to print on colored paper.


[ Read More ]

Posted by Maxine Cleminson - - 0 comments

The Chubby Cheeks One is four, and a reluctant writer. In fact, he's a reluctant artist too and is just the sort of kid that would rather be playing active games than sitting practising early learning skills like holding a pencil, using scissors or learning to write his name. It's not that he doesn't enjoy school (he loves it) - he knows his 'wetters' [sic], loves books, singing and many of the other activities at pre-school. He just does not particularly enjoy trying to write. Apparently, it's not just with me either. His pre-school teacher has made a few comments about his refusal to participate in these types of activities (he often politely tells her "I just can't do it") and it's something she would like us to work on with him.

I'm sure that some of it is just that innate competitive boy thing... if it's something I'm not instantly good at, I don't want to know!!! I am very familiar with this attitude from dealing with the Big One (soon to be 8... eeek!) who is very motivated by instant success and is not good at persevering with activities that take practise to master. He will never be a musician for this reason!

But we have been trying to encourage our youngest to be more interested in learning penmanship, and I thought I would share some of the better resources we have come across.


Image courtesy of David Castillo Dominici/www.freedigitalphotos.net 


TRADITIONAL WORKBOOKS
I purchased some of the Kumon series of workbooks aimed at preschoolers on the recommendation of a friend. I was a little skeptical as to whether my boys would be interested at all in something so 'school-like' and traditional, but was actually pleasantly surprised. The "My First Book of Tracing" workbook (click on the picture below for more information) was higher quality than I was expecting. In fact, the first thing the Chubby Cheeks One said was: "I'm not supposed to draw on books, just paper". The workbook pages are thick with colorful illustrations and very different to the worksheets he is familiar with from school. The activities themselves start out very easy and I was initially concerned that the level was not going to be challenging enough. However, the instant successes from the 'easy' early pages really gave my little one a confidence boost so that he was keen to continue. In fact, I had to rein him in a little or he would have raced through the whole book in one go! The activities become harder and more complex as the book goes on and do require greater concentration and dexterity. Overall, I was very pleased with this activity book and have ordered others since. They are particularly useful as a short 5-10 minute quiet activity.

To assist with his pen holding, I bought some pencils with a triangular shaped body to help him develop the correct grip.


APPS
Him Indoors loves his technology & gadgets and this is something that all three of my boys have inherited along with their Y-chromosome! Getting to use Daddy's iPad is a rare treat in our house and one that we have not encouraged. I worry that the kids have too much screen time as it is, without adding another source! However, now that the twins are 4, I wondered whether they might find the prospect of being able to use Daddy's iPad a motivation to practise their writing skills! First things, first. An iPad is an expensive 'toy' and like all kids, ours are known for their occasional clumsiness! So we invested in a protective case for the device. There are many cases designed with kids in mind, but we chose the M-Edge Supershell Case. We chose this one over the rest because of several reasons. Firstly, the design of this case allows access to all the ports without removing it, so you can use headphones with it on (something I was keen to have for when travelling)! You can also easily adjust the volume buttons through the foam. The foam itself is dense and protective, fitting very snugly. However, it isn't so bulky or cumbersome that an adult wouldn't want to use it too. Click on the image below for more information.


We also invested in chunky stylus with a triangular shape like the pencils above. While not cheap, I felt it was worth the investment as practising using a 'pen' was the point of the activity rather than just a fingertip. Again, click on the image to find out more.


With the hardware sorted, we were able to download a couple of 'games' for the boys to try. I used the very useful website, Commonsense Media, to lookup apps with good reviews. You can search for games by device (iPad, Kindle, iPhone etc...), by age, and by skill or topic. You can then read reviews and decide which one you like before downloading. Very handy! Click here for their app search!

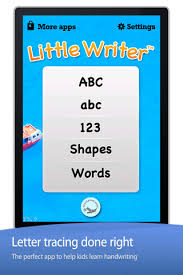
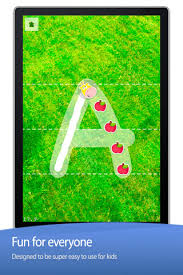
My kids' favourite app for tracing has got to be the Little Writer app by Alligator Apps (Innovative Mobile Apps Ltd). The music is appealing but not grating. The game encourages the kids to trace the letters by following a trail of themed dots (so if the background is the ocean, they follow fish)! The activities include writing uppercase and lowercase letters, numbers and shapes. But the game the boys enjoy the most is the one where they get to write basic words. If they trace the letters C-A-T carefully and correctly, they are rewarded with a picture of a cat! The only thing I wish it would do in this activity is sound out the letters phonically (rather than by name) as they are writing them so that the kids can start to make the connection between the sound a letter makes and the word being written. However, for the purpose of practising using a pen and writing letters this app is great and my little ones love it!


PRINTABLES
One of the things we have been asked to work on with our twins is getting them to write their names independently. The Shouty One has pretty much mastered this and can independently write his name correctly. We are still working on it with the Chubby Cheeks One and I was delighted to find a free resource online that allowed you to create and print your own traceable worksheets. At www.kidzone.ws you can select whether you want block, script or cursive font and input the text you want the child to practise writing... once submitted a custom printable is created! So easy!


How do you encourage your reluctant writer?!


[ Read More ]

Posted by Maxine Cleminson - - 0 comments

It's that time of year again, folks! I'm talking about that time of year when you have a lot of people to buy gifts for to thank for their help throughout the year... teachers, neighbors, babysitters, cleaners etc... The thing is that this can often get expensive and so it is always nice to find a great idea for a relatively inexpensive gift that punches above its weight! This year I have 5 teachers to buy for now that the twins have started school and so things are getting even costlier!

Last year I made a cookie mix in a mason jar to give to the Big One's Teacher as a little gesture of thanks at Christmas... it was a cute little extra to go along with the gift card we gave her! However, the cookies were a one time only gift... once the mix was used that was it. So, I was looking for something that had a bit more longevity! The answer came in the form of the brilliant 1-2-3 cake in a mug mix I made earlier in the year thanks to a Pinterest find. I love this easy mix for its simplicity and relatively guilt-free treat! What better?

To make 5 gifts you will need...

  • 5 x 16 oz (1 US Pint) mason jars ... I bought mine in the Dollar Store!
  • 2 x box mixes of Angel Cake
  • 2 x box mixes of another cake variety (I used Betty Crocker Devil's Food Chocolate cake)
  • 5 x Xmas themed mugs (again from the Dollar Store)
  • 5 x tablespoon measures (again from the Dollar Store)
  • Ribbon in a Christmassy colour
  • Adhesive labels to stick on the jar (see link below)
  • 5 x brown paper gift bag
  • Brown paint
  • Red Paint
  • Black marker

First off, make up the cake mix in a gallon sized freezer bag.  See the details here. Carefully spoon the mix into the jars, shaking to settle if necessary.  Close the lid carefully, and tie a tablespoon measure around the neck of the jar with the ribbon ... tie in a bow. Decorate the paper bag... we made reindeer handprints!

Label the jar with an adhesive sticky label... write the instructions on the label.  You can use the printable attached here with the sticky labels below.


Put it all together in the gift bag with some shredded paper and colored tissue paper!  Et voila!


[ Read More ]

Posted by Maxine Cleminson - - 6 comments

Who am I kidding? My parenting style is rather more 'dragging' than 'bringing' up children! I have muddled my way through the last 7 years with more luck than judgement and yet along the way I have gained a few insights into what makes kids tick. I'm sure there are plenty of parenting experts out there who will tell you that you shouldn't reward children for doing the things you've asked of them; that praise and a sense of altruism should be enough for your kiddo, but sometimes that just doesn't cut it in my household. Confession time... I am not above a bit of bribery if it gets the desired outcome. There. I said it.

Not that I make it easy on my kids. They have to work for their rewards and in that sense I see it as a life lesson. And for this purpose I am a big fan of charts!  It must be the scientist in me... because I am a complete sucker for a nice, colourful and clear to follow chart! Sometimes it's for chores, and I've blogged about this before with my pocket money tracker. Other times it's to modify unwanted behaviour or to encourage new things. However, the principal is the same... you set a target, your child earns a reward after completing the required steps to get to that target.

Ideas for targets (we call them 'challenges' in our household):
  • Try new foods
  • Use the potty
  • Brush teeth without complaining
  • Don't backchat
  • Make my bed in the morning
  • Stop biting fingernails/picking nose & etc...
  • Share nicely with my siblings/friends
  • Do-as-I-am-asked-the-first-time-not-the-tenth!

Remember:

  1. Make your targets S-M-A-R-T (specific, measurable, achievable, realistic & timely)! - A good target is easy to measure and is easier to explain to a younger child, however, with my older one I have used a simple challenge of "I will behave better this week" with my judgement being the deciding factor!  The number of steps that need to be completed before the reward will vary with the child's age.  A 2-year old will get easily bored and frustrated if they have to use the potty 20 times before getting their hands on the prize, whereas an older child can understand the process better and can manage a greater challenge.
  2. Two Directions - I've found a useful technique is to allow progress on the chart to be 2-way!  So you can progress towards the prize for good efforts (demonstrating the task/behaviour required), but you can also step back for doing the opposite (refusing to cooperate or an act of bad behaviour)!
  3. Rewards only need to appeal to your child - In terms of reward it doesn't need to break the bank and it may not be something you personally would consider worthwhile... as long as it's something your child craves!  While cold, hard cash seems to be the Big One's raison d’ĂȘtre these days, the twins are still easily pleased with things like an extra story at bedtime or a trip to the park at the end of the week.  Even with the Big One, his understanding of the value of money is still not very developed, so I don't need to offer big bucks!  Other ideas include: offering a set amount of screen time the reward or even the return of items that have been confiscated... desperate times call for desperate measures!!! Lastly, I try not to offer food as a reward as I worry about setting them up for a lifetime of unhealthy food habits.
  4. Chose a chart that 'fits' your child's interests and likes -  This can be a highly motivating factor for a child!  A Thomas train moving along a track towards Knapford Station for a reward might send a train-mad little one off to use the potty quick smart!  Or a Dora the Explorer taking steps up the mountain?  The possibilities are endless!  
  5. Keep up the momentum - place the chart somewhere visible and accessible and make a point of reviewing it at least once a day!


As I've documented on my blog previously, all 3 of my kids are Lego (and Duplo) obsessed, and so the chart below has worked an absolute charm.  The printable charts are available to download for free on the understanding that they are not altered and are used for personal use only (thanks!!).  Simply click on the thumbnails below to open the full-size .pdf files.  Print on standard letter sized paper (8.5'x11"), trim along the dashed line and affix to a wall so the bottom of the chart meets a table top or counter where you can build your Lego tower.


There are two charts to choose from: a Duplo chart for younger children (aged 2 and a half up to about 5) and a Lego chart for older kids (5 and up).  You will need 10 Duplo blocks (the single sized ones with 4 knobs on top) or 20 of the square 2x2 Lego bricks.  Keep them in a pot or sandwich bag next to the chart and get your child to add (or remove) a block as earned.


A 'girly' alternative!  

Lego may not float your child's boat.  And if you let your imagination run wild, it doesn't have to be a paper chart at all!  Think of the popular 'Pandora' charm bracelets and you'll realise how much a new bead on a string might motivate a jewelry-obsessed little girl!  Simply reward her with a bead for each positive step toward a target, and take one away for bad behaviour.  Once the required number of beads have been earned she can wear the bracelet with pride (a built in reward!!!!).  You can buy perfect little sets of beads from Melissa & Doug for this purpose:


[ Read More ]

Posted by Mama Max - - 4 comments

Cupcakes are very pretty in their own right when frosted and decorated, but I've always found the patterned paper cupcake cases a waste of money. Most are cheap and end up absorbing the oils in the cake batter to look greasy and consequently their colours & patterns become transparent anyway. I personally prefer to use good quality plain parchment paper cases or the foil ones. However, for a special, themed party it's nice to add a bit of color & pattern to the base of the cupcake too! This is where cupcake wrappers are useful!

You can buy them, but they are relatively easy to make yourself!  I made a classic Union Jack flag cupcake wrapper, but also a diamond studded crown to mark the Queen's Diamond 60th Jubilee!


To make these cupcake wrappers, you will need...

  • a printer
  • white cardstock (or plain paper) - standard letter size (8.5"x11")
  • scissors
  • sticky tape or glue
  • cupcakes

First of all, click on the previews of the templates below to open the main .pdf file.  The template is set up to print on standard letter size paper measuring 8.5" x 11" (slightly smaller than A4).  Ensure that your printer is set for this size of paper and make sure that there is no 'scaling' of the document selected.  Print onto plain white card or paper.  Cut out and tape (or glue) the two short sides together with a minimal overlap to create a slightly conical ring.  Gently drop the frosted cupcake into the wrapper.  This template will fit most normal sized cupcakes, but if you want to check beforehand, the diameter of the base is 45-50mm and across the top is approximately 75mm.


These printables are provided free on the understanding that they are for personal use only and not to be reproduced, altered or used for commercial purposes (please contact me for more information if necessary)!  Thanks!


[ Read More ]

Related Posts Plugin for WordPress, Blogger...