• RSS
  • Facebook
  • Pinterest
  • Twitter
  • Google+
Showing posts with label computers. Show all posts
Posted by Maxine Cleminson - - 2 comments

Him Indoors has been making an effort to get on top of the tangle of cables/chargers/things-with-wires that we have stashed in various office drawers/cupboards/boxes.  I guess it's a sign of the times we live in, but I honestly can't believe how many of the darn things we have floating around!  I don't think it helps that every manufacturer seems to have a slightly different take on the same thing!

Yet again, I'm posting with an idea that's not mine.  Hmmmm.  As before, this one is also too good to not share!  Him Indoors was inspired by a pin he saw online (hahaha... he's now Pinterest obsessed too!) and has been on a mission ever since.  The original idea comes from a chap called Beserk who posted a tutorial on Instructables.com, however, my clever hubbie has been improvising with pipe insulation too!

It really is the simplest idea.  Why are they always the best?


You will need...
  • A tangle of cables in desperate need of sorting out!
  • An empty cardboard box, approximately 6 inches deep (a shoe box would do, but a large spotlight lightbulb box did the trick for us).
  • A variety of cardboard tubes - toilet paper rolls work well, as do kitchen paper ones cut in half.  Alternatively, you could use a length of pipe insulation tube, cut into 4-5 inch lengths (the nice thing about pipe insulation is that it is split down the length allowing easy insertion of the cables, but still grips them tightly).
Like the design of a bees' honeycomb, you essentially create an array of hollow cells separated by thin walls.  Each cell (tube) contains a neatly folded cable and can be removed independently from the box, without disturbing the others.  Another benefit is that you can easily see the item you are looking for with a quick glance!


Easy peasy!


[ Read More ]

Posted by Maxine Cleminson - - 0 comments

One of the most exciting parts of this blogging journey (aside from knowing that people are liking my ideas), has been learning new techy-skills. Things like writing basic html and getting my head around CSS style sheets... please don't stop reading at this point if the IT jargon is making you nervous, I'm not going to be getting all techy on you, honest... and there's a thank you gift at the end!!

As a small-scale blogger, I'm not employing anyone to help with webdesign or marketing of my site so it's all quite an adventure for me! Once I'd figured out how to customise the design of my blog, and got into the swing of posting stuff... the important thing was to figure out how to reach potential readers! One of the most obvious ways for me to market my blog has been through social networking sites. Consequently, I've got myself addicted to Pinterest (see my earlier post about this new phenonemon... I have invites to spare if you're interested!) and I've recently started a Twitter account and have been making tentative steps into the world of tweets (get me... I'm up on the lingo too!). However, as a regular user of Facebook for the last few years, it was this networking tool that I wanted to make the most of!

So, a few weeks ago I created a Facebook page. It feels a bit... well, cheesy, I suppose... setting myself up to collect 'Fans'. But in reality, I think it's a fabulous way to enable people who are interested in keeping up to date with my blog posts, to do so easily! And without them having to subscribe by another feed method like RSS, which to the technically-challenged (like my dear Mum... sorry, if you're reading this) is yet another thing to log-into and get to grips with. Let's face it... just about everyone on the planet has a Facebook account now (errrr... except my Mum! Bless!).


However, my page was lacking a little pizzazz, so after a bit of investigating today, I figured out how to create a custom landing page for my Facebook page! For the uninitiated, this is the page non-fans will first get to when they follow a link to your facebook page. One of the things I thought I'd add to my landing page is a little thank you to people who take the time to stop by.  So, I've created a little printable pdf file...

Mama Max's Cooks' Ready Reference!

Once you have 'Liked' my new Facebook page, you will be able to print off this handy little sheet to keep close to hand in your kitchen. It was inspired because of my own need to keep referencing the same information over and over again ... either online or in cookery books!  So I figured it would be much easier to have all the information consolidated and stuck on the inside of my pantry door for quick reference when needed!


In the printout you will find:
  • Oven temperature conversions (particularly useful to a Brit like me who's used to celsius, but living in the US where everything is in Farenheit!)
  • Volume conversions (US cups to ml)
  • Food substitutions... and this is invaluable, even if I do say so myself! Got a recipe that calls for some buttermilk and you don't have any (or any cream to make your own... see my previous post about making butter!)?  Then simply look up the ingredient on the list to see what you can use as a reliable substitute! Handy, eh?
Of course, I don't want to penalise those wonderful folks who've already 'Liked' my page... if you've done so but would like a bit of printable-action... just go to my Facebook page look in the menu below the logo in the top left corner and click on 'Welcome' (it has a little star icon next to it!).

And for those of you who aren't on Facebook yet and would still like a copy of this handy printable... drop me an email to mamawithideas at gmail dot com (you know what I mean, I just don't like spam unless it comes out of a tin!).


Enjoy, and thanks again!
[ Read More ]

Posted by Maxine Cleminson - - 5 comments

or could also be titled... "Pimp my Pumpkin!".

My husband, Him Indoors, has been a bit obsessed by the amazing pumpkin carvings you see online!  So I thought I'd have a go at immortalising him in squash ready for the upcoming Halloween festivities.  This is for him... love you, hun!


Don't be put off if you think you're not very artistic as it's suprisingly straightforward to do once you have edited your photograph properly!

You will need:
  • A decent digital photograph, preferably one where the subject's features are somewhat shadowed so there's a good contrast between light and dark.
  • A software program that allows you to edit photos.  I used Paint.net, a free downloadable photo editing software for computers running on Windows.  However, there are loads of similar applications that can be used to equal effect.
  • A printer & paper.
  • Tracing paper or baking parchment.
  • A stapler.
  • A soft pencil.
  • A sharp knife.
  • A spoon.
  • A pumpkin.
  • A candle.
So I started with a great picture of Him Indoors and opened it in Paint.net.  The first thing I did was to remove the sky background as it was too similar in contrast to his head... if your subject's face has a contrasting background you will probably not need to do this step. To do it I used the 'Magic Wand' tool, set at 50% tolerance.  I clicked on the sky behind his head to select it and then deleted those areas.


I then used the 'Paint Bucket' tool, with the color black selected to repaint the sky black.  This provided a greater contrast between Him Indoors' face and the background.  I also used the 'Rectangle Select' tool to select the area of the photo I was focusing on, and then clicked on the 'Crop to selection button.  This removed the parts of the photo I didn't need.


Then I clicked on the top menu 'Adjustments', scrolled down and selected 'Black & White'.


Next, I clicked on the top menu 'Adjustments' again, this time scrolling down to 'Brightness/Contrast'.  By increasing the contrast to maximum and the brightness slightly up, the image became simply black and white with no shades of grey.


Then I clicked on the 'Paintbrush' tool, again with black and setting the paintbrush size to 50.  I was then able to paint over the extra white bits that weren't needed.  The aim is to have a very simple image to carve.


To save ink when printing, I inverted the image (basically switched the white & black areas).  I did this by clicking on the 'Adjustments' menu, and selecting 'Invert Colors'.  Finally, I clicked on the menu 'Effects' at the top, and selected 'Blur', and then 'Median Blur'.  I set the radius setting to 10 with a 50 percentile.  This again simplified the image, removing unnecessary detail.


Once the image was printed to the appropriate size (use the printer options to scale the image to fit your paper).  I then had to use the template to get the design on the pumpkin.  To achieve this, I used tracing paper and a soft graphite pencil.  I stapled a piece of tracing paper to the back of the printout.  It's important to do this so that your image isn't flipped when you transfer the tracing onto the pumpkin.  I then held the paper to the window and traced around the outline onto the tracing paper.


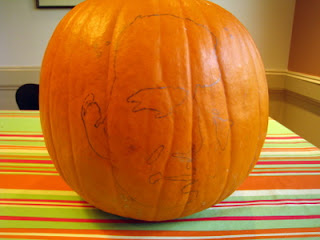
Then when I had completely traced the outline of the image, I pinned the tracing paper to the pumpkin with dressmaking pins (making sure the pencil outline was touching the pumpkin skin).  Using my pencil, I gently drew over the back of the image so that the pencil outline was transferred onto the pumpkin.


Then using the sharp knife I gently cut away the surface of the pumpking skin in the areas that were black on my original printout.  Once completed, I hollowed out the inside of the pumpkin with a spoon, being careful not to break through the surface where I had carved the design.  A candle inside the pumpkin revealed the image to it's full potential!


It's a Blog Party


newlyweds-blog.com


Strictly Homemade Tuesday
[ Read More ]

Posted by Maxine Cleminson - - 5 comments

I've just discovered a new source of inspiration! Pinterest.com. And I love it. Now, these are not my ideas so I suppose they don't really belong in my blog. However, I am always on the lookout for inspiration and as a source of new ideas this is just too good not to share!

It's such a simple premise and yet soooo effective and addictive. It's essentially a virtual pinboard. If you're anything like me, you'll probably come across stuff while browsing the internet that catches your eye but is of no use to you at exactly that moment ... so you move on and forget about it. Well no more. You simply add a 'Pin It' button to your bookmarks bar at the top of your browser, and then whenever you see and image that you like/inspires you/you would like to use for reference in a later project ... whatever... you click on it and it gets added to your own virtual pin board with a link to the original website. I would have loved to have had this tool when planning my wedding all those years ago!

You can create lots of different pinboards for different purposes, e.g. recipes, interior design projects, style/mood board, fashion ideas, party planning, weddings. But you can also browse other people's pinboards and re-pin their ideas onto your own boards!


I've only just started a few pinboards of my own, but I can see that it's going to become addictive! After a short browse I've seen some amazing things that I can't wait to try out. I thought I'd share 10 of the best pins I've spotted on other people's boards to give you an idea of the sort things you can stumble on.

1.  I just think this is genius.  A roll of masking tape is all you need to keep your Hot Wheels obsessed kids occupied for hours.  My boys are gonna pee their pants when I get this set up for them!  The best bit is you can make a new track everyday!


2. With Christmas coming up I can't wait to have a go at recycling some old lightbulbs into tree decorations!


3. A bit of pampering at home? This recipe for a homemade exfoliating body scrub sounds gorgeous!


4. I just know I'll be needing this tip in a few years when I have 3 sweaty teenage boys' school shirts to launder! A bit of baby powder sprinkled on before ironing prevents sweat stains on white shirts!


5. I'm all about the neck accessories and think this is gorgeous! I have some leftover grey jersey material from making the Big One's Lego Sensei Wu Halloween costume, so am definitely going to give this a try!


6. Now this makes sense to me. A cork board on the inside of a cupboard door to keep all those little notes and recipes and coupons (etc...) close by without cluttering up the place!


7. A cute and simple dressing up idea for kids. Recycled plastic soda bottle make a perfect rocket pack!


8. One to remember for summer BBQ's... paper cupcake cases make brilliant covers to prevent wasps from going in your drink when dining al fresco!


9. So simple. Cover a painting tray with foil and then no pesky cleaning up. Why did I never think of that one?


10. Perfect for 4th of July Celebrations!


Pinterest is currently invite-only and there's a waiting list. However, I have a limited number of invites available if you're interested. Contact me via the comments below or through my Facebook page if you're interested!
[ Read More ]

Posted by Maxine Cleminson - - 6 comments

The Big One is attending his first ever Cub-o-ree this weekend (a Cub Scout camp-out, without the overnight stay!).  To say he's excited is an understatement.  He's imagining running through the undergrowth like Indiana Jones by day, and toasting marshmallows over the campfire by night... I haven't had the heart to explain to him that there's a fire ban ongoing here in Texas!  Oh well.

I'm hoping that the Cub-o-ree Halloween Pumpkin Parade will prove enough of a distraction!  However, at only 6 years old, I wasn't sure I wanted to let him loose on one of these surprisingly tough vegetables with a knife!  Cue (another) trip to the Emergency Room!  Luckily, the rules state that the Pumpkin can be carved or decorated so I figured we could go to town with the paints!  The thing is... what to paint?
The Big One (and just about every kid at his school) is obsessed with a certain video game involving some pesky porcines and some furious, feathered flying objects!  I am, of course, referring to Angry Birds... the infuriatingly addictive game that has been downloaded a staggering 400 million times across the various platforms!  Phew!  So, the Big One and I decided to make a pair of pumpkins based on this phenomenon.  We chose the iconic, original Red Bird and the King Pig (it made me laugh a lot to discover that the choice of pigs as the Birds enemy was based on the Swine Flu epidemic that was dominating the news at the time it was being developed!).


You will need...
  • Two pumpkins.
  • Red and green paint (poster paint or acrylic paint is fine).
  • Paintbrushes.
  • Painting aprons/coveralls, plus old newspapers or plastic sheeting to protect your surfaces.
  • Sheets of craft foam - white, black, yellow and green (I got a large pack of multicolored foam sheets from our local dollar store!).  Alternatively, you could use card.
  • Scissors.
  • Glue. 
  • Black marker.
  • Stapler.
  • Stick-on gems or sequins.
  • Dressmaking pins.
Firstly, you will need to paint the bodies.  Very easy.  One red and one green pumpkin.  Paint the top half and allow to dry before turning over to paint the bottom.


Then you need to recreate the Angry Bird & King Pig's features out of the craft foam.  I used the Angry Birds wikia page for a definitive image of both characters and then copied the facial features onto the foam (first in pencil, then marker) before cutting out. I then assembled the 'faces' with glue and allowed them to dry.  For the King Pig, you will also need to create ears and a crown.  The ears can be created by cutting an arch shaped piece of foam and pinching the bottom square edge and stapling together.  The Crown can be created by cutting triangles out of the long edge of a rectangular piece of yellow foam.  Glue sequins or craft gems along the opposite edge, before curling into a tube and stapling together.


Once the paint and glue are dry, all that is left is to assemble your Angry Bird & King Pig!  After considering several methods of fixing the faces onto the pumpkins, I figured that the easiest and most discreet method is to pin them on.  Using regular dressmaking pins, fix the foam facial features and accessories into place. Push the pins all the way into the pumpkin flesh so the pinheads are flat to the surface... even with a tough ol' Pumpkin this can be done by hand!


The finished articles. So now with his Lego Sensei Wu costume, our creepy Spider decorations, fruit leather healthy Halloween treats, and the Jack O' Lantern Cake pops... we're really gearing up for Halloween!


Strictly Homemade Tuesday
[ Read More ]

Related Posts Plugin for WordPress, Blogger...