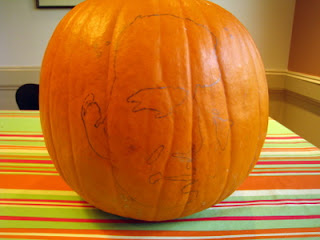
or could also be titled... "Pimp my Pumpkin!".
My husband, Him Indoors, has been a bit obsessed by the amazing pumpkin carvings you see online! So I thought I'd have a go at immortalising him in squash ready for the upcoming Halloween festivities. This is for him... love you, hun!
Don't be put off if you think you're not very artistic as it's suprisingly straightforward to do once you have edited your photograph properly!
You will need:
- A decent digital photograph, preferably one where the subject's features are somewhat shadowed so there's a good contrast between light and dark.
- A software program that allows you to edit photos. I used Paint.net, a free downloadable photo editing software for computers running on Windows. However, there are loads of similar applications that can be used to equal effect.
- A printer & paper.
- Tracing paper or baking parchment.
- A stapler.
- A soft pencil.
- A sharp knife.
- A spoon.
- A pumpkin.
- A candle.
I then used the 'Paint Bucket' tool, with the color black selected to repaint the sky black. This provided a greater contrast between Him Indoors' face and the background. I also used the 'Rectangle Select' tool to select the area of the photo I was focusing on, and then clicked on the 'Crop to selection button. This removed the parts of the photo I didn't need.
Then I clicked on the top menu 'Adjustments', scrolled down and selected 'Black & White'.
Next, I clicked on the top menu 'Adjustments' again, this time scrolling down to 'Brightness/Contrast'. By increasing the contrast to maximum and the brightness slightly up, the image became simply black and white with no shades of grey.
Then I clicked on the 'Paintbrush' tool, again with black and setting the paintbrush size to 50. I was then able to paint over the extra white bits that weren't needed. The aim is to have a very simple image to carve.
To save ink when printing, I inverted the image (basically switched the white & black areas). I did this by clicking on the 'Adjustments' menu, and selecting 'Invert Colors'. Finally, I clicked on the menu 'Effects' at the top, and selected 'Blur', and then 'Median Blur'. I set the radius setting to 10 with a 50 percentile. This again simplified the image, removing unnecessary detail.
Once the image was printed to the appropriate size (use the printer options to scale the image to fit your paper). I then had to use the template to get the design on the pumpkin. To achieve this, I used tracing paper and a soft graphite pencil. I stapled a piece of tracing paper to the back of the printout. It's important to do this so that your image isn't flipped when you transfer the tracing onto the pumpkin. I then held the paper to the window and traced around the outline onto the tracing paper.
Then when I had completely traced the outline of the image, I pinned the tracing paper to the pumpkin with dressmaking pins (making sure the pencil outline was touching the pumpkin skin). Using my pencil, I gently drew over the back of the image so that the pencil outline was transferred onto the pumpkin.
Then using the sharp knife I gently cut away the surface of the pumpking skin in the areas that were black on my original printout. Once completed, I hollowed out the inside of the pumpkin with a spoon, being careful not to break through the surface where I had carved the design. A candle inside the pumpkin revealed the image to it's full potential!


I am so impressed this is super cool, and you have some major talent, I can barely do a regular pumpkin face with a stencil :)
Thanks so much for sharing with Newlyweds pumpkin Linky!
Thanks, Jenna! I really appreciate your comment! It was honestly easier than it looks once you've created your template from the photo! Really ... if I can do it, anyone can!
Coincidentally, we also live in Texas and have identical twin boys, a year younger than yours from the sounds of it! Double the fun, eh?! Although, in all honesty, they're a piece of cake compared to their Big Brother (who's six going on sixteen)!!!!
Great hearing from you!
Wow, this is amazing!! My husband's birthday is right around Halloween, I wish I'd seen this before his birthday party!
Thanks, Naomi! Maybe next year's birthday instead?! It's really not that complicated and is quite quick to do once you've edited your photo! Glad you stopped by my blog! x
Very great post. I simply stumbled upon your blog and wished to mention that I've really enjoyed browsing your blog posts. In any case I will be subscribing in your rss feed and I'm hoping
you write again very soon!
Take a look at my web-site ... margarita maker