The Big One is attending his first ever Cub-o-ree this weekend (a Cub Scout camp-out, without the overnight stay!). To say he's excited is an understatement. He's imagining running through the undergrowth like Indiana Jones by day, and toasting marshmallows over the campfire by night... I haven't had the heart to explain to him that there's a fire ban ongoing here in Texas! Oh well.
I'm hoping that the Cub-o-ree Halloween Pumpkin Parade will prove enough of a distraction! However, at only 6 years old, I wasn't sure I wanted to let him loose on one of these surprisingly tough vegetables with a knife! Cue (another) trip to the Emergency Room! Luckily, the rules state that the Pumpkin can be carved or decorated so I figured we could go to town with the paints! The thing is... what to paint?
The Big One (and just about every kid at his school) is obsessed with a certain video game involving some pesky porcines and some furious, feathered flying objects! I am, of course, referring to Angry Birds... the infuriatingly addictive game that has been downloaded a staggering 400 million times across the various platforms! Phew! So, the Big One and I decided to make a pair of pumpkins based on this phenomenon. We chose the iconic, original Red Bird and the King Pig (it made me laugh a lot to discover that the choice of pigs as the Birds enemy was based on the Swine Flu epidemic that was dominating the news at the time it was being developed!).
You will need...
You will need...
- Two pumpkins.
- Red and green paint (poster paint or acrylic paint is fine).
- Paintbrushes.
- Painting aprons/coveralls, plus old newspapers or plastic sheeting to protect your surfaces.
- Sheets of craft foam - white, black, yellow and green (I got a large pack of multicolored foam sheets from our local dollar store!). Alternatively, you could use card.
- Scissors.
- Glue.
- Black marker.
- Stapler.
- Stick-on gems or sequins.
- Dressmaking pins.
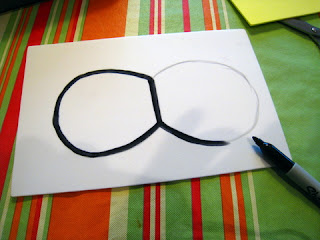
Then you need to recreate the Angry Bird & King Pig's features out of the craft foam. I used the Angry Birds wikia page for a definitive image of both characters and then copied the facial features onto the foam (first in pencil, then marker) before cutting out. I then assembled the 'faces' with glue and allowed them to dry. For the King Pig, you will also need to create ears and a crown. The ears can be created by cutting an arch shaped piece of foam and pinching the bottom square edge and stapling together. The Crown can be created by cutting triangles out of the long edge of a rectangular piece of yellow foam. Glue sequins or craft gems along the opposite edge, before curling into a tube and stapling together.
Once the paint and glue are dry, all that is left is to assemble your Angry Bird & King Pig! After considering several methods of fixing the faces onto the pumpkins, I figured that the easiest and most discreet method is to pin them on. Using regular dressmaking pins, fix the foam facial features and accessories into place. Push the pins all the way into the pumpkin flesh so the pinheads are flat to the surface... even with a tough ol' Pumpkin this can be done by hand!


Oh my god if my son saw these pics... I'd have to make him do this craft too.... Forget him.... I m getting tempted anyway....cause I m big on angry bird myself.... That's what I do in car pool line when I get there reallyyyyyy early:) ....
Awesome idea... :)
My husband thought these were brilliant!
These are awesome! Magazine Worthy!
Thanks so much, lovely people!! Really appreciate the comments and you stopping by my blog! Mx
LOVE IT! Do you think you can use spray paint?
Thanks! I would guess that spray paint would work fine! I used kid's poster paint and mine are holding up well, although we haven't had any rain and mine are tucked under our porch!