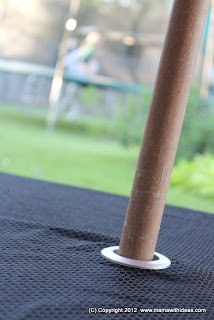
We have a very practical, but not very pretty plastic picnic bench in our garden. Living in hurricane prone Texas, I wanted a cheap and cheerful garden set that was durable and low maintenance, but that could also be stored indoors at very short notice in case of an impending storm (hey, we don't have a pool to chuck them in like other locals do!)... better that, than having table sized shrapnel blown into the house! Our picnic bench is sturdy, functional but not in the slightest bit stylish. And I have tried covering it in tablecloths but then you always have the issue of where to stick the umbrella!!
But I found the perfect, low cost and (dare I say it?) stylish solution... plus it literally only takes 5 minutes and no sewing! I'd seen tablecloths for sale designed specifically for picnic tables, with elaborate zipper or velcro openings (from the center to the edge of the cloth)... but in considering the dilemma, I figured all you would need is a way to neatly create an edge to a hole big enough for the umbrella pole to slide through. Bias binding would work, but would be fiddly and time consuming. And then... the perfect solution popped into my head! Curtain grommets or eyelets!!!!
You will need:
- A tablecloth that fits your table... this could be made from any material, including wipe clean oilcloths!
- Scissors
- A pen or dressmakers chalk
- A curtain grommet with an internal diameter wide enough to fit your pole... mine measured 1-9/16" across and said it would fit curtain rails up to 1-3/8" and it worked brilliantly!


Firstly, work out where the center of your tablecloth is and mark it with the pen or chalk. Cut a circle out that is slightly smaller than the internal diameter of the grommet (your grommet may even come with a template!).


Line up the male and female sides of the grommet on either side of the fabric.


Clip the two sides of the grommet together to conceal the cut edges of the hole in the fabric. Iron if needed et voila!

So this is the before...

And this is the after!


Much nicer!!!!


