


I've been stuck indoors for the last few days with one poorly twin and another who's been bouncing off the walls and in need of something to do! So I decided to brave an activity with him that I had been planning to do solo, and was delighted to find that it was suprisingly child-friendly and a fun way to spend some time with my little one while his brother had a much needed nap on the sofa!
The project I had been planning was to make a orange & clove pomander. I have always thought that these look lovely and Christmassy... plus, I'm all into heavenly scented interiors and think the combination of citrus, clove, and other spices is perfect for the winter! These classic 'air fresheners' have been popular since medieval times and form the basis of many family holiday traditions. When properly cured (dried out) they can last indefinitely, requiring just an occasional refresh in boiling water for a minute before re-drying! The only issue is that they require patience and can take weeks if not months to cure properly.
However, I am not your patient sort (ahem...) and like instant results!!! So, I cheated slightly and jump-started the drying process in the oven! I also don't necessarily expect them to last a lifetime... if they don't cure properly and need discarding after Christmas, I'm not going to lose any sleep. Afterall, the Shouty One and I spent an enjoyable hour together making them and we benefitted from the gorgeous scent for a few weeks... that makes it worth it in my book!

You will need...
- A firm, blemish-free orange (choose one that smells divine even through the skin!!)
- Whole cloves - you can buy these in the spice aisle in the supermarket, but they can be expensive, so look out for them in the bulk food aisle or in health/whole food stores.
- Approximately a yard of ribbon (1/2" or 1cm wide is perfect).
- A tablespoon each of ground cinnamon, ground nutmeg and/or ground allspice (optional)
- A skewer or toothpick
- Sticky tape or masking tape

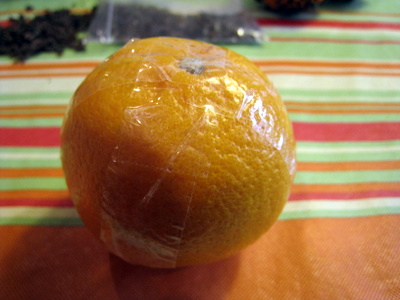
First of all, you should use the tape to mark out where your ribbon will go so that you can pierce the cloves around it. You will probably want to tie the ribbon in a cross with two lengths circling the ball perpendicular to each other (like a gift wrapped present).
Then, you will find it easier if you use a skewer or toothpick to pierce the orange skin prior to inserting the cloves. You should pierce all the way through the skin to the flesh underneath. If you try to insert the cloves without doing this you often end up crushing them! You can pre-design where you plan to insert your cloves by marking the skin with a pencil... intricate designs are fun, but so too is the random mass covering favored by the Shouty One! My 3 year old managed to wield the skewer carefully (under strict supervision obviously) and he really enjoyed this bit! Once you have created your holes, insert the cloves into the skin pointy end first, until securely embedded.


The Shouty One (with Monkey looking on) proved suprisingly adept at this and it was good practise of his fine motor skills!


Different designs work equally well. Remove your tape when finished.


At this point, if you were being traditional, you would prepare the pomander for curing. This involves tossing the orange in a pungent mix of spices, plus some Orris Root powder (apparently, this ingredient is made from the ground root of a type of Iris and is a natural preservative). You could use a few drops of Sandalwood oil instead of the Orris Root. Then you would put the orange pomander, plus the spices/preservative agent in a paper bag, and store in a cool, dry place for an extended period (between 3 weeks and up to 6 months) until completely dried out. You can tell when a pomander is completely cured as it will have shrunk in size and will feel light and hollow.
As mentioned above, I'm not that patient! I tossed my orange pomanders in a mix of ground spices and then placed them into a cooling oven (after cooking the boys tea) for a few hours with the convection fan on. The smell that wafted around my house was simply heavenly!


After that, tie the ribbon around the pomander creating a hanging loop and a bow at the top. You can then hang your pomander somewhere warm and dry so that it can continue to dry out while you enjoy the fragrance. Keep an eye on your pomander and if it looks like it's not drying, but going bad, you will have to discard it!

So pretty and festive! And they smell gorgeous too!


What a great idea. I made these this year and was inspired by your designs. It took me a while to find a good source for orris root powder. I finally found one at www.maisonterre.net
I have warm memories of making these with my Mother as a child. Thanks for the detailed instructions. I sharpened the chopstick a little to make a smaller hole. They really look awesome set out in a wooden bowl!
https://www.flickr.com/photos/adam_t4/15835951580/