


As mentioned in my post about prepare-ahead roast potatoes... I was determined not to spend the lead up to Christmas slaving away in the kitchen! So when I stumbled across this special mini-cheesecake pan I was intrigued! I knew it was possible to freeze cheesecake as you can buy ready made ones in the freezer section, so I was hopeful that this could provide me with the perfect solution: a tasty, classy dessert with a bit of Christmas 'wow factor', that could be prepared weeks in advance and simply defrosted in the refrigerator overnight, placed on a serving plate (no need to even cut into portions) et voilà!

PART 1: Review of Norpro Mini Cheesecake Pan
The Norpro 3919 Mini Cheesecake Pan

As with all new gadgets and gizmos I wanted to do a trial run, and so made some vegan cheesecakes for a Thanksgiving pot luck dessert! They turned out better than I'd hoped and the tin was very easy to use.
Advantages
- The individual cups enable you to create professional looking individual desserts perfect for entertaining.
- You can use it for more than just cheesecake! Be creative!
- The non-stick works very well and the desserts I made slid out of the pan with ease.
- The pan feels well constructed and high quality.
- It washes well in the dishwasher.
- The standard recipe supplied with the pan works well and is reliable.
- You can freeze the pan (see the Christmas recipe below to find out more!)
- One of the best things about this pan in my opinion is that you can create a variety of different flavors in the same pan at the same time. I used a basic vegan cheesecake recipe and created 3 additional variations by adding chocolate, lemon juice/zest and coffee to 4 different batches. The results were delicious...


Disadvantages
- The pan is quite expensive when you consider the size of it! However, it is solidly made and should last to make the investment worthwhile. The RRP is $30, however, they are available online
for much less.
- You can only make 12 at a time and it takes a long time to create a batch of cheesecakes, so if you are catering for a larger number of people, you may need more than one pan.
- If you are making cakes (with thin batter) rather than cheesecakes I can see that the batter may leak out of the cups as the loose bottoms are not secured. This could be remedied by placing a baking sheet under the pan to catch any small leakages.
Verdict
I love this pan... it was very easy to use and gave very professional looking results. However, one of my very favorite things about this pan is the ability to pop it in the freezer as I did a few weeks before Christmas.
Part 2: Dulce de Leche mini cheesecakes you can prepare ahead of time!
At the beginning of December I stumbled across a recipe for cheesecake using one of my favorite ingredients EVER. Dulce de Leche... the stuff of dreams! A South American friend, Marcela, introduced me to this delicious ingredient in her to-die-for Alfajores and I have been hooked ever since! For the uninitiated it is a thick, caramel-like sauce that is made from sweetened milk that has been simmered for a long time. Delicious. Anyway, I digress... to get back to my point, I found a cheesecake recipe with this ingredient and wanted to serve it for Christmas dessert but wanted to be able to prepare it well in advance.
So I took a chance... I made the cheesecakes in my Norpro mini pan and once completely cooled, I wrapped the whole pan in baking parchement & foil and froze it! I removed the pan from the freezer on Christmas Eve and put in the refrigerator to defrost over night. At the end of our meal, I simply slid each individual cheesecake out of the pan and placed on a serving platter with a chocolate garnish! Done. Perfectly tasty and perfectly easy!
This recipe is adapted from the one on mommykitchen.net.
To make 24 mini cheesecakes (2 batches) you will need...
Crust:
- 2 Cups Graham cracker crumbs
- Half a bar of chocolate (I used some almond dark chocolate) - optional
- 1/4 cup sugar
- 5 Tablespoons butter (melted)
Filling:
- 8oz cream cheese (softened)
- 1 egg
- 12 oz can evaporated milk
- 14 oz La Lechera condensed milk (sweetened condensed milk)
- 1 /2 tsp Mexican vanilla or pure vanilla extract
- 14 oz can Nestle La Lechera dulce de leche
First, crush the graham crackers and chop the chocolate in a food processor until even crumbs. Add the melted butter and process again briefly to mix well. Grease the individual cups of the mini pan and then add a spoonful of the crumb mix to each cup to half fill it. Using a spoon (or a shot glass) press the mix down firmly.


To make the filling, simply blend the cream cheese, egg, evaporated milk, sweetened condensed milk and vanilla with a hand mixer or blender until creamy and very well mixed. Add 2-3 tablespoons of the dulce de leche and blend again. Spoon the mixture into each cup to almost the top (leaving a small gap at the top for the topping).


Bake in the oven for approximately 20 minutes or until golden brown on top. It may look jiggly still but will carry on cooking in the next step. Turn the oven off, and open the door an inch or two and leave the cheesecakes in there for an hour. At the end of the hour, take the pan out of the oven. Insert a skewer in the cheesecake to ensure it is done... it should come out clean.
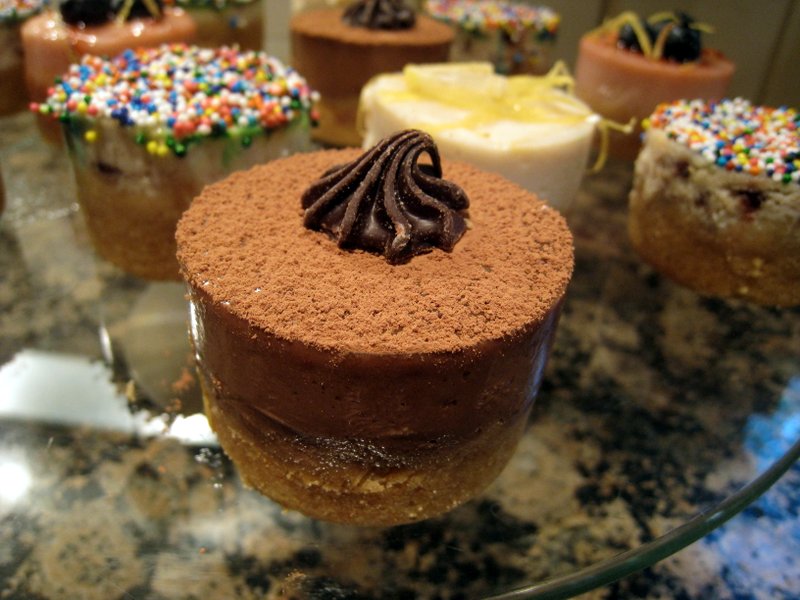
Once completely cold, I spooned a dollop of the remaining dulce de Leche on each cheesecake and spread with a knife. I placed a sheet of non-stick baking parchment over the pan and then double wrapped in foil to prevent freezer burn. Then the whole thing went in the freezer.


On Christmas Eve, the pan came out of the freezer and into the refrigerator the defrost. And at the end of our Christmas meal, I simply slid each cheesecake out of the pan and onto a serving plate, topped with a chocolate garnish! Truly scrumptious!


Click here
Did you use a water bath when you baked the cheesecakes? Because of the hole in the bottom, I was trying to figure out how this would be done...But your cheesecakes look great so maybe there's no need for it.
Hi Gwen! I didn't use a water bath, although I was toying with the idea. My cheesecakes turned out okay without, but if you'd rather use one, why not wrap the outside base with a layer of foil before sitting in the water? Worth a try and may stop your top cracking like mine did a little bit with the Dulce de Leche recipe! Let me know how you get on!
Max
x
That's a good idea! I'd have to use a thick cookie sheet though and it'd only be a shallow bath, but it's worth a shot. Thanks for the quick reply! =]
did you make those tree decorations???
Yes ... although they're supposed to be holly leaves & berries!!! Very easy... just melt some colored candy wafers (or chocolate) in a piping bag (or a sandwich bag with the corner snipped off), and pipe a design onto a sheet of baking parchment. Allow to harden and then gently lift off and use to decorate!
Hi has anyone used this pan for cakes?and did it cum out nice an soft or was it dry?I was thinking of trying a chiffon cake in this pan coz I love the size of it..ur help appreciated. .thanks